Image Map

Wednesday, March 18, 2015

Swiss Chard, Pear & Gruyere Tart

Sorry I skipped out on posting a St Patrick's day recipe yesterday. It's actually one of those holidays that just pass me by. I don't go for green beer and I'm not particularly fond of corned beef. The boyfriend and I went to the local diner last night and had eggs and toast. Nothing was green and it was terribly un-festive! If you feel like I really dropped the ball, here is a recipe I made a few years ago for March 17th...

Moving on to something that I am a huge fan of... Tarts! 


I love how you can throw just about anything into a tart and call it dinner. This one takes advantage of those delicious pears that are out in the markets right now. The filling is full of vegetables, making this the perfect option for a "Meatless Monday" dinner. Or an everyday meal in my world!


You'll notice that only half of my tart is topped with pears. That's because the boyfriend hates pears. I know, he's insane. In order to ensure that he ate dinner, I just ate the rest of the raw pear myself. No complaining from either side!


The flavors of this tart were amazing. It might have something to do with the copious amounts of gruyere and parmesan cheese that have been shredded over the top! Whatever the reason, I wound up eating a full quarter of the tart for dinner, then another large slice for lunch the next day.

Friday, March 13, 2015

Candy Challenge 2015 -- ???

Of all the recipes that I post here at WITK, the ones that I enjoy the most are the candy recipes. Perhaps it's because I'm a scientist at heart and I love playing with boiling sugar. The difference of a few degrees in temperature of your sugar syrup will take you from a soft nougat to a hard caramel. The creative options for candy are endless. Sweet, salty, savory. Everything goes with chocolate.

After taking a break from candy making, I want to start bringing it back to the blog. I think the best way to do this is to challenge myself with a goal. My goal is to complete every single recipe in the cookbook - Chocolates and Confections, by the Culinary Institute of America. It will likely take longer than 1 year, as there are more than 150 recipes in this cookbook. At least I have a head start from the 2011 Candy Challenge, I've already made 12 of the recipes!


Truffles and Chocolates
Black Forest Truffles
White Chocolate Truffles
Sesame-Ginger Truffles
Dark Chocolate Liqueur Truffles
Coffee Truffles
Gianduja Truffles
Coconut-Lime Truffles
Honey-Lavendar Truffles
Green Tea Truffles
Milk Chocolate Liqueur Truffles
Orange Truffles
T'ings
Mint Meltaways
Chocolate-Dipped Anything
Peppermint Bark
Bark

Brittles, Toffees, and Taffies
Hardy Candy
Candy-Coated Fruits
Candy-Coated Apples
Peanut Brittle - Completed - July 27, 2011
Pecan Buttercrunch
English Toffee
Chocolate Taffy - Completed - August 27, 2011
Molasses Taffy
Saltwater Taffy
Peanut Butter Taffy - Completed - February 12, 2013
Soft Caramels
Caramel Apples

Fudge, Fondant, and Pralines
Chocolate Fudge
Vanilla Fudge
Root Beer Float Fudge
Peanut Butter Fudge
Maple Fudge
Penuche
Firefudge
Creamsicle Fudge - DONE
Fondant
Mint Patties
Cherry Cordials
Rock Candy
Pecan Pralines - Completed - July 24, 2012

Marshmallow, Nougat, and Jellies
Marshmallows - Vanilla-Honey Marshmallow - Completed March 26, 2015
Divinity
Chocolate Nougat - Completed - May 6, 2011
Peanut Butter Nougat - Completed - September 16, 2011
Nougat Torrone
Turkish Delight
Sponge Candy - Completed - May 12, 2012
Pectin Jellies
Agar Jellies
Citrus Confit
Chocolate-Coated Confit

Nuts!
Marzipan
Cherry-Almond Marzipan
Tropical Marzipan Squares
Walnut Marzipan
Toasted Hazelnut Squares
Pistachio Squares
Basic Gianduja
Layered Gianduja
Amigos
Buckeyes - Completed - June 6, 2011
Rochers
Almond Dragees
Chili Pecans
Caramel Corn
Coconut Joys - Completed - June 14, 2011
Turtles

Chocolate Molds and Cups
Buttercreams - Completed - April 12, 2011
Molded Cherry Cordials
Peanut Butter Bombs
Belle Helene
Black Pearls
Gianduja Molds
Dish of Dulce
Lattes
Passions

Layers of Flavors
Kitchen Sink Bars - Completed - August 29, 2011
Marshamels
Nutty Bars
PB&J Bars
Peanut Butter Goodness
Cocomels - Completed - November 7, 2013


Here's to mastering candy and chocolate once and for all! Are there any recipes on this list that you would like to see me tackle first?

Anyone want to join me on this journey? I promise to pair it up with an exercise routine, or a fool proof way to pawn off your treats on others!

J@H 2015 - Cadbury Creme Eggs

It's post-Mardi Gras, which means that we are in Easter season! I chose two classic and fun Easter treats to try and replicate for my Junk @ Home challenges this month. We're starting out with a controversial one, the Cadbury Creme Egg!


Why is it controversial? If you have missed out on the news this year, Cadbury Creme Eggs (in the UK) had their recipe tweaked this year. The chocolate shell chocolate was swapped from the original Dairy Milk chocolate to a Cadbury milk chocolate. Apparently they also decreased the number of eggs in a package and kept the price the same. Candy inflation!

Making these chocolates at home, you can choose whatever type of chocolate you want! Desire a dark chocolate creme egg? No problem. White chocolate and peanut butter shell? Why not!

I started off trying to make the creme egg in the traditional way. You create the two halves of the egg and then join them together. This proved to be pretty tricky and a bit of a mess...


Attempt number one was a bit of a fail. The two half shells didn't melt together and the creme filling oozed everywhere! The candies got stuck in the molds and took a few good whacks to remove. There was creme filling all over the place. I decided to change my game plan and create half-shell creme eggs. Besides, a store-bought creme egg is a mouthful.  Half a serving is really the way to go! (That's what I'm telling myself at least)


Creating these half-shell creme eggs was super easy and they're so cute! I went with a rich milk chocolate for the shell and a vanilla-flavored creme filling. Just a few short steps and you can also have some homemade creme eggs for Easter!


Step 1. Fill the candy molds completely with melted chocolate. Wait five minutes and pour out chocolate. (You can pour it back into the bowl with the melted chocolate, or onto a silpat).

Step 2. Add a drop of yellow-tinted filling.


Step 3. Fill with white-colored creme, until just below the top of the mold.

Step 4. Cover creme filling with melted chocolate. Level off bottoms with an offset spatula.

Set the candies by putting the candy molds in the fridge for 30 minutes. Flex the molds and pop the candies out. Share with your friends!


One Year Ago: Portuguese Sweet Bread
Two Years Ago: Red Lobster Cheddar Bay Biscuits & Cajun Chicken
Three Years Ago: Sponge Candy Cupcakes
Four Years Ago: Green Velvet Cupcakes

Cadbury Creme Eggs
Majorly adapted from This Website

I adapted this recipe from the original to remove all concern over corn products and GMO foods. I source my glucose syrup from a place in Manhattan, you can get the same stuff from Amazon! This glucose syrup is made from non-GMO wheat and will set any fears to rest. If you don't have concerns with using corn syrup (I use it all the time too), feel free to substitute corn syrup for glucose.

Egg candy molds (I got mine from Michaels)

12 ounces Milk chocolate, melted and tempered

1/4 cup glucose syrup (85g)
2 tablespoons unsalted butter, room temperature
1 1/4 cups powdered sugar (160g)
1/2 teaspoon vanilla extract
1/8 teaspoon salt
1 tablespoon water
Yellow food coloring

Beat together glucose syrup and butter. Sift in powdered sugar and beat to combine. Add vanilla extract and salt, mix until combined. Add tablespoon of water and beat until creamy and smooth. Scoop out 1/4 cup of creme and tint with yellow food coloring.

You can load the two creme colors into piping bags or zip top bags. It is easier to pipe the filling into the candy shells, rather than trying to scoop it in with a spoon.

Fill candy molds all the way to the top with melted chocolate. Wait 5 minutes. Pour out chocolate and let the molds drip for 1 minute. Flip back over and let set for 30 minutes.

Pipe a "yolk" into the bottom center of the candy shell with the yellow creme. Cover with white creme, filling almost all the way to the top.

Cover with more melted chocolate. Use a knife or offset spatula to even out the tops of the candies.

Pop the molds into the fridge for about 20-30 minutes, or until the chocolate is set. Remove from the fridge and flex the molds to release the candies. Happy Easter!


Tuesday, March 10, 2015

Over the Top Carrot Cake

Every once and a while, you have to make something a little extra special. Any Milk bar recipe qualifies as just that, over the top, but it requires a little preparation. 


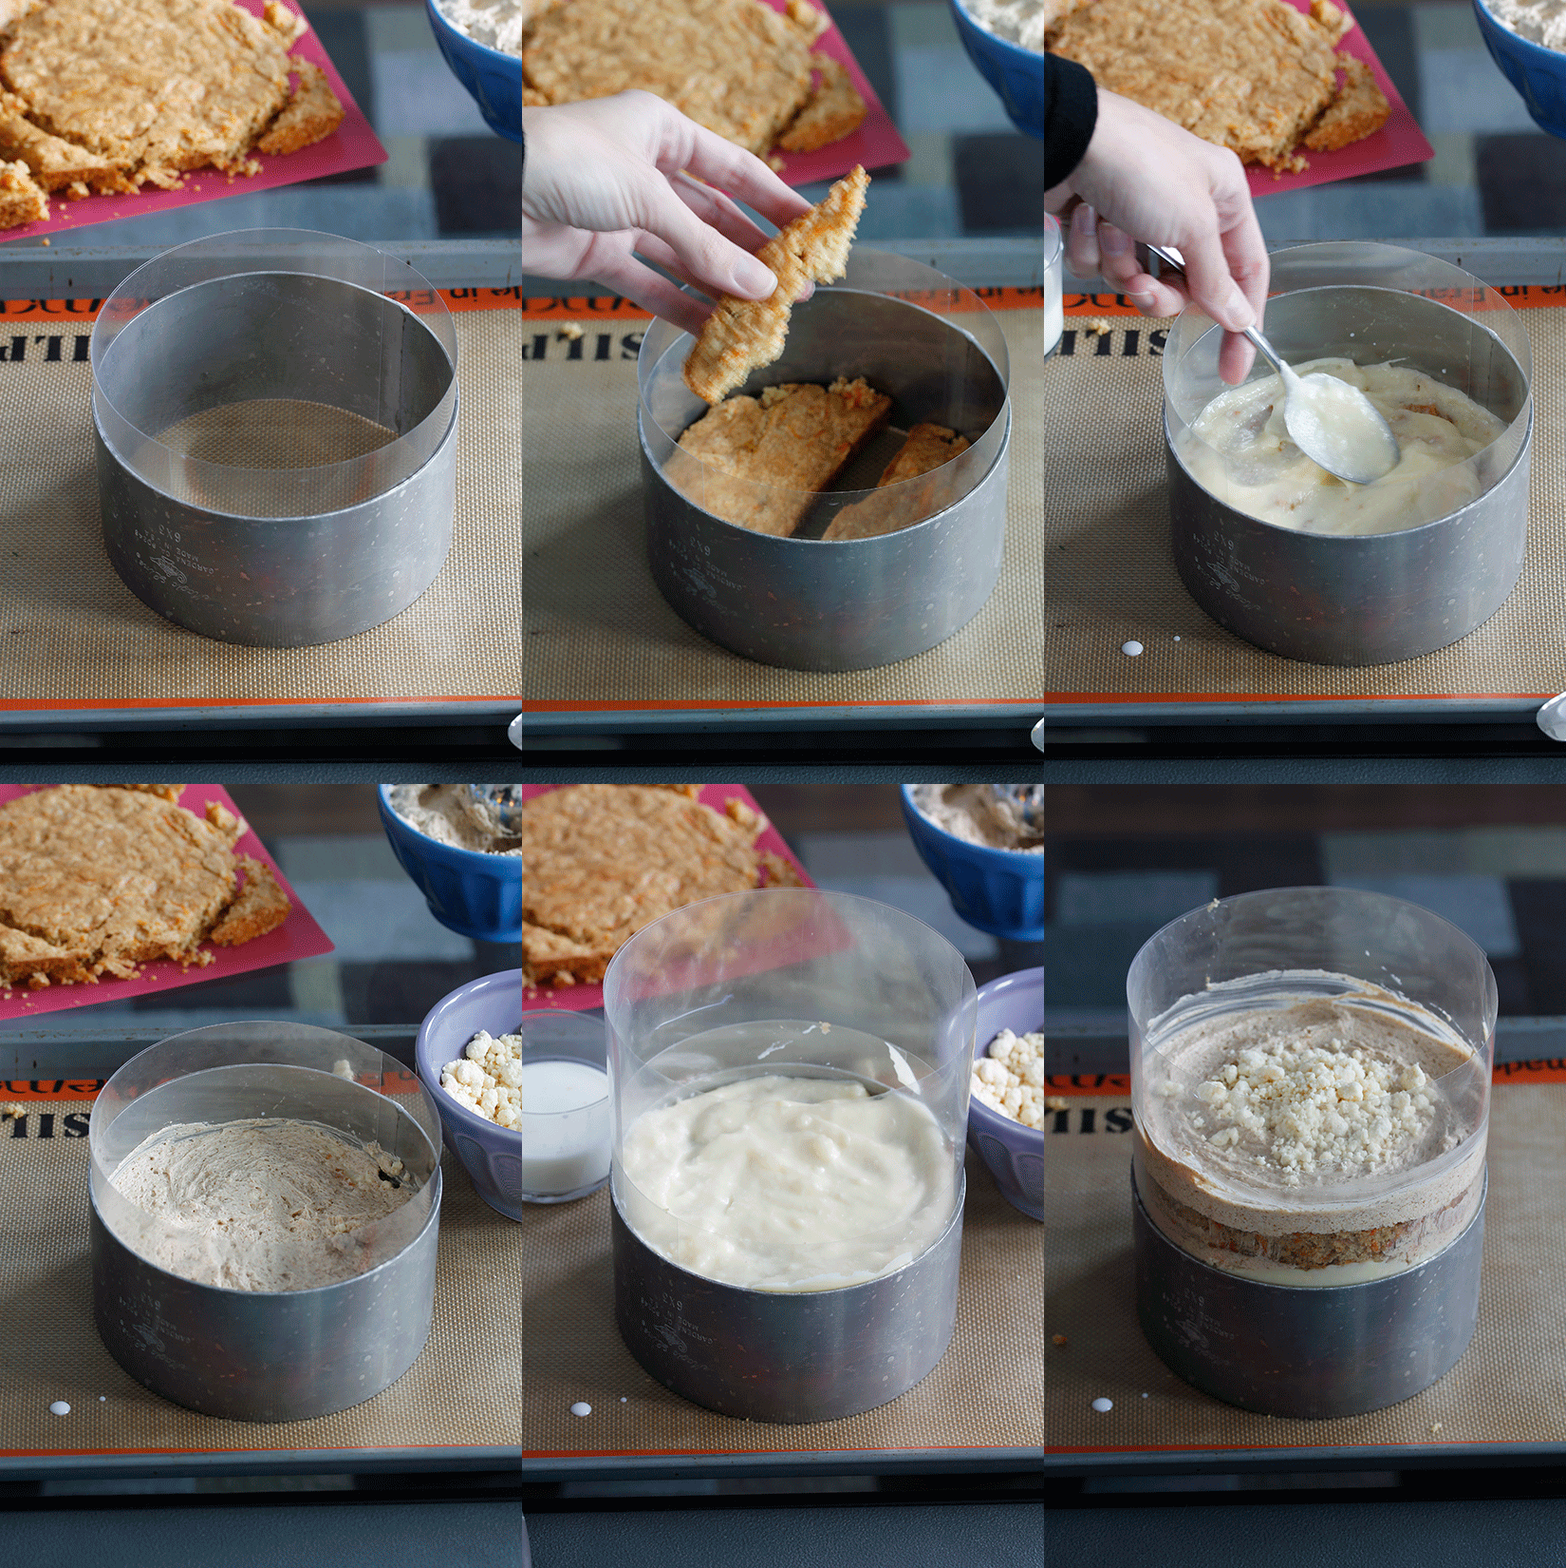
Okay, a lot of preparation. This recipe asks you to make a cake, graham cracker crust, frosting, liquid cheesecake and crumb. I would recommend making this recipe over the course of two days. Or one long snow day. That's what I did!


While it took several hours to complete this cake, the end result is worth the effort. The cake is soft and tender. The frosting is rich with graham cracker and butter. My only complaint? The original recipe is a bit too salty, which is a common issue with Milk bar recipes. The recipe below has the salt content tweaked a little, but is otherwise true to the original.


Be sure to share this little cake with friends and family, there is no way you will be able to (or should) eat the entire thing on your own. A small slice will do you, don't let your eyes be bigger than your appetite!


Dig in!

Two Years Ago: That Chicken Lettuce Cups
Three Years Ago: Asparagus Lasagna
Four Years Ago: Apple Marshmallows & Apple-Cinnamon Krispy Treats

Thursday, March 5, 2015

Hoisin Chicken Stir Fry

It's another snow day here in Central New Jersey! The snow is coming down steady and it's a good heavy snow. The kind of snow that makes perfect snowmen. You can start with a tiny snowball and roll it up into a giant car-sized ball, perfect for carving out into an igloo. Have you ever made a snow igloo? Growing up in Buffalo, we had many winter igloos in our yard each year!


Sadly, I'll be working from home today, not playing outside and making giant snow igloos. On the bright side, I made this stir fry last night! Lunch hour will be tasty leftovers. This recipe comes together so quickly, I probably could prepare this fresh again today in less than fifteen minutes. Plus, this recipe has hoisin in it and I love anything with hoisin!


Are you stuck inside again today because of the weather? This snowstorm is huge! Stay safe and warm everyone, Spring is coming soon! Until then, I'll be looking out the window at the falling snow, drinking hot chocolate.

Two Years Ago: Biscofferoos
Three Years Ago: Homemade Greek Yogurt
Four Years Ago: Sugar Crisp Cookies

Tuesday, March 3, 2015

Raspberry & Cheesecake Mousse Entremet

Recently, we had a "Bake Off" at work. In reality, it was just a day where everyone brought in homemade goodies and ate way too much sugar. There were no winners and no losers, just a whole lot of sugar. Well, maybe the diets were the losers of the day. I'm pretty sure that I didn't have lunch that day.


Rather than baking a cake or a batch of cookies, I decided to go big and prepare an entremet. I was dreaming of a light and bright dessert that tasted like spring. The joconde sponge cake came together quickly and holds a citrusy layer of lemon cheesecake mousse and the lightest raspberry mousse ever.


A small serving of this dessert was enough to satisfy my sweet tooth. It only lasts in the fridge for a day, as the cake absorbs the moisture from the mousse. I reccommend making this cake over the course of two days.  Day 1 - prepare the sponge cake, cover with plastic wrap and set in the fridge for the second day. Day 2 - Cut sponge cake, make cheesecake mousse, make raspberry mousse, fill cake.


I know it looks like a lot of work, but it's totally worth the effort! It's got great wow factor for a dinner with friends, or trying to win a bake off!

One Year Ago: Whole Wheat Pasta with Cabbage & Leeks
Two Years Ago: Chicken Florentine with Pasta
Three Years Ago: Honey roasted Root Vegetables
Four Years Ago: Gorgonzola Risotto

Sunday, March 1, 2015

Junk @ Home 2015 - Twinkies

Coming at you with the fourth Junk @ Home challenge of 2015. I'm a few days late, sorry!  I was out of two weeks ago and I got sick while I was away! Luckily it was just a 7-day cold and I'm nearly back to 100%. Just in time to make some knock-off Twinkies this weekend!


Lots of people have tried their own recipes for this classic snack cake. Two years ago, when Hostess was going out of business, everyone freaked out and developed their own recipe. Not being a Hostess snack cake fan, and knowing that someone would likely buy the patents and start making them again, I never jumped on the bandwagon.


This recipe was requested when I sent out the call for 2015 challenge foods. Rather than trying to replicate the flavor and texture of a classic Twinkie, I decided to create a homemade version with real world flavors. Of course I bought myself a box of snack cakes and did some taste testing. To tell the truth, I have no idea what the flavor is supposed to be. Mystery food. Franken-food.


This recipe is like an inside-out cupcake. Soft yellow cake, filled with fluffy vanilla frosting. It tastes natural, not mysterious, and delicious. This recipe won't save you any calories, but it's completely free of any preservatives. This snack cake won't last through an nuclear winter, better eat them right after they're done!


Save your money, make your own cake molds! Unless you want to make these cakes again and again. I didn't want one more piece of baking equipment to store in our little kitchen.

One Year Ago: Portuguese Sweet Bread
Two Years Ago: Olive Garden Salad Dressing & Chicken alla Carbonara
Three Years Ago: Peach Macarons
Four Years Ago: Chocolate Buttercream Truffles


Wednesday, February 25, 2015

Ramen Noodle Soup with Vegetables

I was really hoping to make it out of this cold and flu season without falling ill, but it just wasn't to be this year. I started feeling a bit off early last week. You know how it does, slight tickle in the throat, headache, drippy nose... I was hoping to fend off any bugs with some orange juice and extra sleep. Sadly my little cold turned into a full blown cold by Thursday - the day of my big presentation.


I flew off to Santa Monica, California last Wednesday morning for a conference. Thursday I had several meetings, an afternoon presentation and half a speaking voice. Not so fantastic. Luckily it was a short presentation and I was able to beg off of dinner for the night.

Room service soup and HBO for the evening was just what the doctor ordered. This soup would have been perfection, but unfortunately the leftovers were in New Jersey.


If the end of winter has caught you in its grips and you are feeling unwell, print off this recipe and give it to someone close by. The recipe is super simple and even the worst cook can whip up a batch of soup for you!

One Year Ago: Chocolate Chip Cookie Dough Stuffed Chocolate Cupcakes
Two Years Ago: Cherry Kuchen Bars
Three Years Ago: Cherry Coconut Bagels
Four Years Ago: S'mores Cupcakes

Saturday, February 14, 2015

Junk @ Home 2015 - Girl Scout Samoas (aka Caramel delights)

Call them Samoas, call them Caramel delights, whatever you choose to call them and wherever you live in America, they are delicious. I just wrote that they are devilious. Yeah, that's totally (not) a real word and it applies to these cookies. Because they make you want to eat the entire box! So devilious...

Anyways...


I added these cookies to my Junk at Home challenge because they were highly requested during my oh-so-official poll in December. People love Girl Scout cookies and they want access to them year round.


I hate to tell people, for fear that they will blame me when they gain forty pounds, but two varieties of Girl Scout cookies are available year round. Thin Mints and Samoas.


The same factory that produces Samoas and Thin Mints, also produces a Keebler-branded version of each cookie - the Grasshopper and the Coconut Dream. They are the exact same cookie. You can buy these any time you want, so long as you are at a grocery store. But if it's Girl Scout cookie season, be sure to buy from those cuties. Yes, even though they cost like $85 a box now. (Price of cookies when little Vicki sold cookies? $2.25/box. True story.)

Since you can buy the legit, original cookie anywhere, anytime, and there are dozens of recipes on other food blogs, I didn't want to make just any Samoa cookie. I made them a little bit more tasty, with more chocolate. And salted caramel. Enjoy.

Four Years Ago: Homemade Butterfinger Bars

Dark Chocolate, Salted Caramel Samoas
A Wilde Original

For the Cookies

1 stick (8 tablespoons) unsalted butter
1/2 cup powdered sugar
1/2 teaspoon vanilla extract
1/3 cup natural cocoa powder
3/4 cup plus 2 tablespoons all-purpose flour

Cream butter with sugar until fluffy. Scrape down the sides of the bowl and add vanilla extract. Beat to combine. Sift in cocoa powder and all-purpose flour. Mix until smooth. Lay out a long sheet of plastic wrap. Pour dough onto plastic wrap and fold over. Roll out dough to 1/4-inch thick. Place on a baking sheet and set in the fridge to chill for 1 hour.

Preheat oven to 350 °F. Take dough from the fridge and stamp out donut-shaped cookies (using either a donut stamp or two circular cookie cutters. Bake cookies for 10-12 minutes. Once baked, remove from the oven and let cool for 2 minutes on the pan. Carefully remove from pan and let cool completely on a wire cookie rack

For the Caramel topping

2 cups caramels, unwrapped (one entire bag of  Kraft Brand Caramels)
3 tablespoons heavy cream
1 teaspoon kosher salt
1 teaspoon vanilla
2 cups shredded coconut

Place caramels, heavy cream, kosher salt and vanilla in a small saucepan over low heat. Stir caramels until they are all melted and the mixture is smooth.  Using a spoon, coat the tops of the cookies with a thin layer of caramel.

Add coconut to the remaining caramel in the saucepan and stir to distribute. Use a spoon (and probably your fingers) spread coconut-caramel mixture over the cookies. Place cookies in the fridge to set up the caramel.

For the chocolate

1 cup dark chocolate chips

While the caramel is setting up in the fridge, melt chocolate using your preferred method. Easiest option is to place chocolate in a microwave safe bowl, pop in the microwave for 30 second intervals, stirring in between each 30 seconds.

Dip the bottoms of the cookies in melted chocolate, place cookies on wax paper. Once cookies are all dunked in chocolate, pour remaining melted chocolate in a squeezey bottle. Pipe stripes over your cookies. Place in the fridge to harden the chocolate.

Share with your friends.

Thursday, February 5, 2015

Frying all the Potatoes

I may have mentioned a few weeks ago that the boyfriend got me a deep fryer for Christmas. This was both a great gift for me and a self-serving gift for himself. I think he really just wanted some french fries!

I have always been nervous about deep frying. Heating a giant vat of oil to over 300 degrees just seemed like a dangerous proposition. My new deep fryer takes away all the fear and I've been having a great time frying everything! Chicken tenders, chicken wings, donuts and of course, french fries.


I have finally been able to put my French Fries cookbook to good use. I've tried a few methods to get the perfect golden crunch on my fries, the frying method from this cookbook delivers the most delicious and consistent results. I'm thinking of making my way through this cookbook, cover to cover.

I may put on twenty pounds this year...

In other news, I'm putting my gym membership to good use!

Tuesday, February 3, 2015

Sauteed Chicken with Pears

I have been obsessed with pears recently. I've been adding them to my oatmeal, eating them raw and cooking them into my dinner dishes. It might be because pears are in season in the winter and all other fruits have just about zero flavor right now. I don't know why I buy strawberries in the winter, it's really a lost cause.

Pears however are delicious right now! I went with Anjou pears in this dish because they caramelize really well and hold their texture a bit better than Bartlett pears.


If you have everything chopped and ready to go, this dinner comes together very quickly. Brown the chicken, brown the pears, make the sauce. It's the perfect meal to make after a long day at work.


One Year Ago: Chocolate Heart Cookies
Two Years Ago: Chocolate Chip Cookie Dough Yogurt Popsicles
Three Years Ago: Dutch Cheese Pancakes
Four Years Ago: Cranberry-Walnut Celebration Bread

Sauteed Chicken with Pears
A Wilde Original

3 tablespoons olive oil
3 boneless, skinless chicken breasts
Kosher salt
Freshly ground black pepper
2 Anjou pears, peeled, cored and cut into 16 wedges
3 small shallots, chopped
1 tablespoon finely minced fresh sage
2 tablespoons sherry vinegar
1/2 cup white wine
1/4 cup chicken stock
1/2 teaspoon Dijon mustard
1/4 teaspoon cornstarch
1 tablespoon heavy cream

Place chicken in a bowl, add 1 tablespoon olive oil and toss to coat. Season with kosher salt and pepper.  Heat a large skillet over medium-high heat. Add chicken to the pan and saute until browned on both sides and cooked through, about 5 minutes per side (or less, if your chicken is thinner than 1 inch). Transfer chicken to a plate and wrap with foil to keep warm.

Set another skillet over medium heat. Add 1 tablespoon olive oil and swirl to coat the pan. Add pear wedges and saute until golden, turn once and cook until softened.

While the pears are sauteing, come back to the first skillet and reduce heat to medium. Add 1 tablespoon oil to the pan and add shallots and sage.  Saute for 2 minutes, until shallots are softened. Add sherry vinegar and white wine. Stir shallots and scrape up the browned bits from the bottom of the pan. Let bubble and reduce for about 3 minutes.

In a small bowl, whisk together chicken stock, dijon mustard and cornstarch. Add to the skillet and whisk until everything is combined. Cook until bubbly, about 2 minutes. Whisk in cream and remove from the heat.

Slice chicken on a diagonal, add pears and spoon sauce over the top. Enjoy with these root vegetables!

Friday, January 30, 2015

Football Party Foods!

Personally, I'm not heading to a Superbowl party this year. I think the last one I attended was in 2007, living in Wisconsin as a graduate student. I'm not really a fan of the football, but it might not surprise you that I enjoy the food!

Looking for something delicious to make or bring to a party on Sunday? Here are some of my favorites...


What do you like to chow down on at a Super Bowl party? Do you need dessert? Is it all about the chips and dips? Are adult beverages a necessity? Tell me your plans!

Thursday, January 29, 2015

J@H 2015 - Cheese Whiz

It's Superbowl Time! (Do I have to put the "TM" after the word "Superbowl"? Will the NFL sue me if I don't? Anyways...) It's time for the big game and my Junk food at Home challenge was perfectly timed! You might think that I put this recipe in the challenge line-up on purpose. Nope, I had no idea when the "Big Game" was when I scheduled the challenges.


This challenge took a bit of tinkering before I came out with this final recipe. The first batch I made was a cheese sauce, simply milk and cheese. The sauce separated promptly upon being taken off the fire.


Batch two was slightly more successful. I used the same recipe that I have written below, but I allowed it to cool to room temperature before pouring into the whipper. The sauce solidified upon cooling to room temperature. There was no pouring happening with that batch. It's currently in my fridge, I think I'll try it out as a cheese spread...


The third and final batch is the one you see in this post! The cheese sauce is poured into the whipper immediately after the cheese is melted. The cheese is charged with N2O and is ready to go. I don't think that I have the industrial capacity to exactly replicate the density of Cheese Whiz. My cheese is more of a cheese foam. These first few images are of the still-warm cheese foam.


Once the whipping siphon is cool to the touch, it pipes out cheese foam like the stuff below.


The cooled cheese foam holds its shape a lot better than the warm stuff. I would recommend making this stuff just before your friends arrive. You can't put this in the fridge, as the cheese sauce would solidify in the fridge. Enjoy the entire thing of cheese in one sitting, but be sure to share with your friends. It wouldn't be very good for you to eat it all yourself!


One Year Ago: Loganberry Mallomars
Two Years Ago: Fudgy Waffles
Three Years Ago: Raw Salad & Wagamama Dressing
Four Years Ago: Chocolate and Peanut Butter Mousse Entremet


Tuesday, January 27, 2015

Gingered Chicken Stir Fry

If you live on the East Coast, you are probably in the midst of "Snowstorm Juno." If you are in the New Jersey area, then you might be a bit underwhelmed by the amount of snow that has actually fallen. I was told to expect thirty inches of snow at one point, we'll be lucky if more than a foot of the white stuff comes down here. I'm calling shenanigans on this snowstorm. I'm also calling out The Weather Channel on this whole named winter storms thing. Stop trying to make it happen! We don't like it!


Thirty inches of snow or not, I still get to have a snow day from work today! To celebrate a random Tuesday off, I made this stir fry for dinner last night. And I made enough of it so that there was lunch for my snow day. Now, I have major plans for a few hours of work and a bit of baking.


If you are in Massachusetts, stay safe and warm! You guys are supposed to get a whole bunch of snow!

One Year Ago: Chocolate Heart Sandwich Cookies
Two Years Ago: Yogurt with Raspberries and Mint
Three Years Ago: Soft Pretzels
Four Years Ago: Chocolate Marshmallows

Thursday, January 22, 2015

Rigatoni & Meatballs

Winter is the time for hearty foods. Conversely, January is the month of healthy eating.  How does one rectify these two very different ideals?


You make chicken meatballs!


Then pile them high on pasta!


Filling, but not full of calories. Unless you make a tube of crescent rolls to go along with this dinner...  Which you should... Crescent rolls are awesome.


One Year Ago: Wilde Chocolate Chip Cookies
Two Years Ago: Cavatappi Pasta with Sausage and Butternut Squash
Three Years Ago: Country Sausage Pasta
Four Years Ago: Mini Zucchini Breads

Tuesday, January 20, 2015

Cream of Tomato Soup with Rice


I can't say enough about this soup. I have made it in the past and never posted about it before. The flavor is so rich and the soup is super filling. I made this soup on a Monday and happily ate it for the rest of the week. With or without the sprinkling of basil, this soup is a winner. It's also made of ingredients that I commonly have sitting around in my pantry.


My only warning? Don't start this soup at 9:30pm! I neglected to read the original recipe and didn't notice that it had to simmer for an hour. We wound up eating something else for Monday night dinner, because this soup wasn't ready until almost 11:00 pm. The house smelled amazing, but there was no way I was going to be able to wait until then to eat. I was already in my PJs by the time I ladled this soup into storage containers.


Stay warm this winter and eat lots of soup! Start with this recipe, you'll absolutely love it!

One Year Ago: Deep Dish Chicken Pot Pie
Two Years Ago: Almond Cut-out cookies
Three Years Ago: Vegetable Stock, Chicken Stock & Cheesy Potato Soup
Four Years Ago: Lentil Chili

Related Posts with Thumbnails