Image Map
Showing posts with label vanilla. Show all posts

Monday, September 12, 2016

Tailgate Time! - Football Celebration Cake

Today I woke up to chilly temperatures and a definite Fall-like feel to the morning. While the days still feel like summer, the mornings and evenings are beginning to take a turn toward Autumn. In the US, nothing says Fall more clearly than the start of football season. 

This past weekend was the opening of regular season football. Last week I created a few recipes for your tailgating party, today I bring you something to get you ready for the end of the season! It's time to think big for your team and plan your playoff celebration cake!  Being a Buffalo girl I find it a little difficult to even think about calling this a playoff celebration cake, but you can always dream!


I made this cake to celebrate the Buffalo Bills. The layering of colors in this cake is reminiscent of the team logo, with a red stripe slashing across a blue buffalo. If you call yourself a fan of another football team, just swap out the colors for your own team colors! I made a custom blend of red, white and blue sprinkles from three bottles of single colors that I bought at a local cake supply shop. You can pick up your team colors at Michaels Arts & Crafts or online at Amazon.


The cake toppers are also super easy to make! I found a clipart image of a football and traced it onto wax paper. Melting some chocolate chips and transferring them to a zip-top bag with a small piping tip, I was able to draw out the chocolate football and endzone upright.


To keep the local spirit going, you should pair your celebration cake with a local brand of ice cream! Perry's is the local brand of choice in Western New York and I have paired my celebration cake with the "Sundae at the Ralph" flavor. The red and blue sprinkles in the ice cream go right along with my team color theme!

Go ahead and plan for the best, buy your sprinkles and food coloring and get ready to celebrate!  Or just enjoy practicing your layer cake skills and eating the delicious results.

One Year Ago: Pumpkin Mallomars
Two Years Ago: S'mores Cupcakes
Three Years Ago: Cookies Dough Stuffed French Toast
Four Years Ago: Southwest Chicken Burger
Five Years Ago: Baked Pears & Salad
Six Years Ago: White Chicken Chili

Friday, July 8, 2016

Happy 6th Anniversary WITK!

It's that time of year to celebrate here at WITK! It's been six years since I first opened up a blogger account and put my fingers to the keyboard to write. Over the years I've gone through pounds and pounds of sugar, butter and flour. I've tested out recipes from Thailand, Spain, Italy, China, Vietnam and countless other countries. I've deep fried, sauteed, crystallized, baked, but most of all, I've had so much fun.


The best part of blogging over the years is being inspired by the other bloggers out there in the world. I'm constantly amazed at the creativity of the bakers and home cooks living in the blogosphere. Reading through my Bloglovin' feed tempts me to try new things and motivates me to up my game.

However, recently I've been feeling decidedly uncreative. My time has been taken up by work, travel and life and I haven't been able to spend as much time as I would like here at WITK. This is the reason why my anniversary cake for 2016 is more than a little inspired by Sweetapolita. This cake is directly pulled from her 2015 cookbook. The colors were so cheerful and vibrant, the sprinkles so happy and bright, I decided not to deviate from the original design.


Thankfully, I have a few life changes planned in the next few months. These upcoming changes will hopefully bring me more time for creativity and baking! I have a massive desire to finish my 2015 and 2016 challenges and bring you all more candy than your teeth can handle. Until that time, please enjoy this beautiful cake. It is not only stunning, it is super delicious. Major kudos go to Rosie from Sweetapolita. She is such a talented baker and businesswoman. I want to buy all of her sprinkles!


Thank you all for coming along on this journey with me!

One Year Ago: Strawberry Cake
Two Years Ago: Neapolitan Cake
Three Years Ago: Milky Way Cake
Four Years Ago: Buffalo Sponge Candy Cake
Five Years Ago: Banana Coconut Muffins
Six Years Ago: Chocolate Cupcakes (with high altitude recipe)


Yum, Sprinkles!

Thursday, December 17, 2015

Christmas Cake & Ice Cream

With just a week left until Christmas, it's time to choose your dessert recipes and head to the grocery store. I'm going to recommend making something that looks fancy but isn't that difficult to make at all! A roulade!


A roulade is simply a thin sponge cake, rolled up with a buttercream filling. You can add any flavoring to the buttercream to change it up for the seasons. Instead of making a peppermint or chocolate roulade, I decided to pair my cake with an incredibly flavorful ice cream!


I'm happy to be working with one of my favorite hometown brands - Perry's Ice Cream - and bring you their amazing new Winter flavor! A few weeks ago, I received a package containing their traditional Fall flavor, Pumpkin Pie, and this new one, Gingerbread cookie. I was a little leery at first, I'm not a huge gingerbread fan, but one bite had me converted. Even the boyfriend took me up on the offer to try some and he wound up making a good dent in the container.


This ice cream is surprisingly complex. The gingerbread ice cream base is dotted with cookies and filled with ribbons of vanilla icing. I only wish that they sent me just one container, because I will inevitably eat both containers myself.

To make the roulade cake, I enlisted the boyfriend to help me. He generally avoids baking with me, it's not his thing, but this was my lucky day! After prepping all of the ingredients, the cake came together very fast. After cooling, filling and rolling, this cake really topped off our evening. It would make for an impressive and delicious addition to your holiday table!

Disclaimer: I received a box full of Perry's Ice Creams Fall/Winter flavors to try out. I have not received any other compensation for this post and all opinions are my own. I am so happy to partner with small, local companies and share them with the world. I grew up with Perry's and it continues to remind me of home.

One Year AgoWilde Cookies - A list of all the cookies I've made here at WITK!
Two Years AgoCranberry-Orange Soda
Three Years AgoEggnog Mallomars
Four Years AgoThai Chicken Curry
Five Years AgoChorizo & Vegetable Soup

Wednesday, December 16, 2015

Great Food Blogger Cookie Swap 2015


It's been a busy year around the Wilde household. I've barely had enough time to cook real food, with next to no time to spend in the kitchen making something fun. I made sure to make time this season to participate in the annual Great Food Blogger Cookie Swap.

 The Great Food Blogger Cookie Swap 2015

This year I decided to make a classic Christmas treat in mallomar form! Each year for Christmas, my mom buys my dad a box of cherry cordials. I always sneak one (or two) from the box and they always remind me of the holidays. 


Cherry-vanilla marshmallow sits on top of a crisp chocolate cookie. Covered in milk chocolate and topped with a candied cherry, these cookies taste just like the cordial candy, but without the liquid candy center. This recipe may sound daunting, but it's actually very straightforward. If you've never made marshmallow before, don't worry, it's much easier than it looks. The most difficult thing is piping the marshmallow onto the cookies. It takes a few practice pipes before you get the right technique.


If you are looking for one more cookie to add to your tray or bring to a cookie swap, give these a try! They look really impressive and taste even better!

One Year Ago: Candy Cane Mallomars
Two Years Ago: Gingerbread Mallomen
Three Years Ago: Pinata Cookies
Four Years Ago: Peppermint Mallomars
Five Years Ago: Browned Butter Spritz Cookies

Saturday, June 20, 2015

Celebrations

I'm wrapping up my fun with ice cream! Today it's all about bringing back childhood memories. We're doing that with sprinkles. Lots and lot of sprinkles!


I've been seeing a version of this cake around the internet and have been dying to make it in my kitchen. I mean, look at all of those sprinkles! It's so pretty! It's also seriously easy to do. No need to worry about smooth icing, piping bags or imperfections. Just cover your cake with frosting and pour on the sprinkles.


I didn't stop with just sprinkles on the outside, the cake is also filled with adorable bursts of color. This is the perfect cake for a birthday, whether the birthday person be eight or eighty! Just be sure to stock up on sprinkles, you'll need a whole bunch of them.


It isn't a birthday celebration unless there is ice cream to go along with your cake. As soon as I saw this Fireball ice cream among the flavors from Perry's escapes, I knew it would be the perfect pairing with my vanilla sprinkle cake. Nothing reminds me more of middle school than fireballs and this ice cream tastes exactly like the classic candy.


If you are in the region that sells Perry's Ice Cream, you should definitely go and try out this flavor. I was so surprised at how dead on the flavor was in this ice cream. It has a strong cinnamon and spice flavor, with little bits of fireball candy mixed throughout. You definitely don't need to eat an entire bowl of this stuff, a scoop with your cake will totally satisfy.


Feel like a kid again. For your next celebration eat lots of sprinkles and ice cream!


Three Years Ago: PB&J Mallomars

Sunday, March 1, 2015

Junk @ Home 2015 - Twinkies

Coming at you with the fourth Junk @ Home challenge of 2015. I'm a few days late, sorry!  I was out of two weeks ago and I got sick while I was away! Luckily it was just a 7-day cold and I'm nearly back to 100%. Just in time to make some knock-off Twinkies this weekend!


Lots of people have tried their own recipes for this classic snack cake. Two years ago, when Hostess was going out of business, everyone freaked out and developed their own recipe. Not being a Hostess snack cake fan, and knowing that someone would likely buy the patents and start making them again, I never jumped on the bandwagon.


This recipe was requested when I sent out the call for 2015 challenge foods. Rather than trying to replicate the flavor and texture of a classic Twinkie, I decided to create a homemade version with real world flavors. Of course I bought myself a box of snack cakes and did some taste testing. To tell the truth, I have no idea what the flavor is supposed to be. Mystery food. Franken-food.


This recipe is like an inside-out cupcake. Soft yellow cake, filled with fluffy vanilla frosting. It tastes natural, not mysterious, and delicious. This recipe won't save you any calories, but it's completely free of any preservatives. This snack cake won't last through an nuclear winter, better eat them right after they're done!


Save your money, make your own cake molds! Unless you want to make these cakes again and again. I didn't want one more piece of baking equipment to store in our little kitchen.

One Year Ago: Portuguese Sweet Bread
Two Years Ago: Olive Garden Salad Dressing & Chicken alla Carbonara
Three Years Ago: Peach Macarons
Four Years Ago: Chocolate Buttercream Truffles


Thursday, July 3, 2014

Happy Fourth Birthday WITK!

I've been MIA a lot recently but I just had to remember to wish WITK a Happy Fourth Birthday! This year has brought a lot of change and writing at WITK (and WITC) really helped me through a tough time. WITK has been with me through lots of changes and I always like to take this time of year to reflect on how much has changed and how far I've come!


Four years ago, I was living in Colorado. I was packing up my Boulder apartment and getting ready to move across the country, again. My boss had accepted a position at Yale and was bringing a few of his students and postdocs with him. Food blogs were new to me and I thought it would be a great way to stay in touch with my friends across the country.


Three years ago, I was in the midst of moving from Connecticut to New Jersey. I was a few days from starting my first real job and busy deciding what to wear. WITK went from three days a week posting to just two and I was trying to figure out how to cook dinner for two instead of one.


Two years ago, WITK was in the midst of its first big food challenge (Why Bother 2012!) I was enjoying my first summer as a real employed person. Easily distracted, I neglected to cook dinner and made lots of sweets. My coworkers happily gobbled up the resulting desserts.


Last year, it was a tough time and I was in the middle of my summer of unemployment. Recently laid off and seeking a new full-time gig, I threw myself into WITK and my new venture - Wilde in the City. With two blogs to distract myself from the lack of interviews, my third blogoversary gave me a great reason to make a seriously involved cake. So delicious.


This year, I find myself at a new job, getting ready to buy a house and juggling everything rather poorly! Over the past four months I have racked up over 70,000 frequent flier miles, traveled to six different countries and finally made it to Hawaii. All this travel has been tough on WITK, I cooked very little over the past four months.

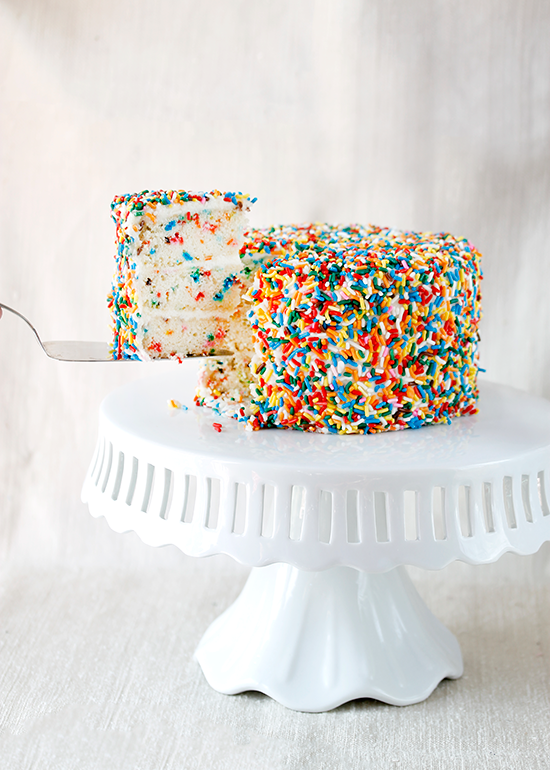
In order to properly celebrate four years online, I made WITK a beautiful cake. I've been meaning to make something from the SprinkleBakes cookbook for a while now. I flipped through the pages until I found this cake - the Neapolitan cake. Three different flavors, baked from a single batter, this cake was a great combination of flavors. My favorites? I preferred the strawberry and vanilla layers. The chocolate layer wasn't flavorful enough for me. If I were to make this again, I'd use some melted chocolate for flavoring the chocolate layer.

Happy Birthday Wilde in the Kitchen! Thanks for being there for me though all the changing times! Also, many many thanks to all of my internet friends out there! Without you on the other end of the internet, it would just be my mom reading these posts! Thanks for coming along for the ride.

One Year Ago: Milky Way Cake
Two Years Ago: Buffalo Sponge Candy Cake
Three Years Ago: Pomegranate Moon Pies
Four Years Ago!!!: Chocolate Cupcakes with Chocolate or Peanut Butter Frosting

Neapolitan Cake
Adapted from SprinkleBakes

The bake times for these cakes were way off. The cookbook suggested that all three cakes would take about the same amount of time in the oven. This wasn't the case however and it's mostly because you have to add extra water to the flavored layers. It takes much longer to bake out all this excess water. I've listed both the suggested and actual bake times in this recipe. Keep in mind that your oven could be a bit different and you should check the doneness with a toothpick. Poke it in the center, when you pull it out there should be only crumbs clinging to the toothpick.  Happy baking!

Cake batter
3 sticks (24 tablespoons) unsalted butter
3 cups sugar
6 cups cake flour, sifted
2 tablespoons baking powder
12 egg whites, room temperature
2 cups milk (I used skim milk with a dash of heavy cream)
1 teaspoon vanilla extract
3-ounce package strawberry Jell-O
1/4 cup unsweetened cocoa powder
1/2 cup hot water

Icing
1 pound cream cheese, removed from the fridge 20 minutes ago
1/2 pound (16 tablespoons) butter, softened
1 pound (about 4 cups) powdered sugar
1 teaspoon vanilla extract

Preheat the oven to 325ºF. Grease three 9-inch round pans with butter. Line pans with parchment paper (I used wax paper because it was what I had!), butter the paper.

In a large bowl, whisk egg whites until stiff peaks form. You can also do this with a hand mixer or in your stand mixer. You'll have to transfer the whipped egg whites to another bowl if you use your stand mixer.

In a large bowl, cream together butter and sugar until smooth and fluffy.  Sifter together flour and baking powder. Add vanilla to milk.  Add 1/3 of the flour mixture to the creamed butter. Mix on low until incorporated. Add 1/2 the milk, mix until blended. Add flour, milk and then flour, mixing until smooth after each addition.  Add egg whites all at once. Gently fold in the egg whites, try not to beat too vigorously and deflate the egg whites.

Divide the batter into three equal batches (I used a food scale to ensure I had three equal amounts). Add 1/4 cup hot water to the strawberry Jell-O. Stir until gelatin is mostly dissolved. Add this to one of the batches of batter and stir until there are no streaks remaining. Pour into one of the prepared pans.

Mix remaining 1/4 cup of hot water with cocoa powder, it will form a slurry. Add cocoa mixture to the second batch of batter. Pour into the second prepared pan. Pour remaining vanilla cake into the third pan. Bake cake layers as follows.

Vanilla - Suggested (30-35 minutes), Actual (33 minutes)
Strawberry - Suggested (30-35 minutes), Actual (45 minutes)
Chocolate - Suggested (25-30 minutes), Actual (40 minutes)

Remove cake layers from the oven and let cool in the pans for 10 minutes. Remove from the pans and peel off paper from the bottom. Let cool cakes completely before cutting. Level the tops of the cakes and stack while you prepare the frosting.

Beat butter and cream cheese until smooth. Add vanilla extract and beat until incorporated. Add powdered sugar, one cup at a time, until the entire pound of sugar is added. If it's too thick - add 1 teaspoon of milk. If it's too thin, add more powdered sugar, one tablespoon at a time.

Assemble the cake - Chocolate layer on the bottom, spread about 3/4 cup frosting on top of the chocolate layer. Add vanilla layer and top with 3/4 cup frosting. Top with strawberry layer and top with 1 cup frosting. Spread cake with a thin crumb coat (Here's a nice video to learn how to crumb coat!). Pop it in the fridge for about 1 hour to harden.  Remove from the fridge and frost with the rest of the frosting. You can get fancy, but I just went with a smooth outside and a swirly top.

Feed this cake to lots of people, there is a lot of butter in here!

Friday, February 7, 2014

CTB 2014 - The Complete Magnolia Bakery Cookbook

Chris Parnell and Andy Samberg may have rapped about them in Lazy Sunday, but any New Yorker worth their salt knows to skip Magnolia's cupcakes and head for their dessert case.  The only thing you should even think about picking up from the Magnolia Bakery is their Banana pudding.


Wednesday, December 11, 2013

Cookie Week - Gingerbread Mallomen

Happy Holidays! It's time once again for the Great Food Blogger Cookie swap! The cookie swap is organized by Lindsay, of Love & Olive Oil, and Julie, of The Little Kitchen and gives food bloggers a chance to swap cookies, share stories and help out. I'm so lucky to be a part of this little food blogging community of ours. 


Tuesday, September 24, 2013

OXO Good Cupcake - Pumpkin & Caramel

First - remember to enter my Fall picnic giveaway!  Last day to enter!!!

With the official start of Fall this past Sunday, I'm ready to break out the apples, pumpkins and fennel.  While at the grocery store this week I decided to stock up on canned pumpkin for the inevitable pumpkin recipes that I want to make.  And believe me, I've got a list of sweets and savories that I want to whip up before everyone gets fed up with pumpkin.  My first pumpkin-filled treat is for the OXO Cookies for Kids' Cancer - Bake a Difference campaign!


Thursday, August 8, 2013

Vanilla Soda & Ice Cream Floats

Carbonate everything!


Ever since I got my soda siphon at the flea market, I've been making so many different homemade sodas!  I seriously want to carbonate everything.  Pretty much anything I can pour into the siphon has a chance of being carbonated.  Except milk, I'm pretty sure that would be just weird.


Having an endless array of soda flavors also gives me endless possibilities of ice cream float flavors!  Which is exactly what I had in mind when I prepared this all natural vanilla soda.


Sure, you could buy some cream soda from the store.  Or you could quickly make this vanilla soda from all natural flavors!  It's seriously simple too.  All you need is a vanilla bean and some palm sugar.  Sure, palm sugar is a specialty ingredient (you can find it in my aStore on the bottom right!), but it gives this soda an distinct flavor.


Make it.  Pour it over ice cream.  Enjoy in a comfy spot outdoors.  Do it do it do it!

Thursday, July 4, 2013

Vanilla Ice Cream with Roasted Cherry Swirl

Happy Fourth of July Internet friends! 


For my international friends out there, I hope you have an enjoyable Thursday.  For my American friends in the Internet ether, Happy Independence day! 

I hope that your day is filled with sunshine, cookouts, ice cream and warm weather.  I love living in the tri-state area this time of year because we can celebrate the holiday all week long!  There have been fireworks dotting the skyline since Saturday as the hundreds of townships in the area celebrate with local events.  Boyfriend and I headed to the Montclair fireworks last night and have big plans to view the fireworks of New York City, western Long Island and eastern New Jersey from high up in the hills of Upper Montclair tonight.


To celebrate Independence day this year, I decided to put my OXO fruit tools to use and make some cherry swirled vanilla ice cream.  A few weeks ago I received a package from OXO (via the OXO blogger outreach program) filled with tools to help us enjoy the summer fruit bounty.  The box included a pineapple corer, mango pitter, strawberry huller, fruit scoopers and this cherry pitter! 


Using the cherry pitter cut my prep time down significantly and my cherry sauce was in the oven in no time.  Cherries are delicious all on their own, but roast them in the oven with a little sugar, you've got a winner.  Rather than just topping the ice cream with the roasted cherry sauce, I decided to swirl it right into the just churned ice cream.  Super delicious, perfectly refreshing for the fourth of July!


Disclaimer - I received the OXO fruit tools as a part of the blogger outreach program.  All opinions about the tools are my own and I have not been compensated for this post.

Tuesday, May 7, 2013

Wilde day in Brooklyn

This weekend I spent my Saturday in Brooklyn with a whole bunch of NYC area food bloggers!  It was the NYC bake sale for No Kid Hungry and the delicious treats were out in full effect.  For some reason I only took one photo, I must have been distracted by all the sweets.  


The crowds were great, thanks to the beautiful sunshine, and once people learned it was all for charity, they really opened up their pocketbooks.  With a plethora of sweet options from over twenty local bloggers and bakeries, along with some fun raffles and tote bags to promote big purchases!  I picked up a few treats for myself too!

Image via Tasty Pursuits
Meet @, @, me, @, and @
Last week I told you about the birthday cake mallomars that I brought to the bake sale.  I also made some raspberry macarons and these Gluten-Free Cookies & Cream Mallomars!  Lillian had suggested I give a gluten-free mallomar a try and I had to agree that was a great idea!


I took one of my classic dark chocolate cut out cookies and swapped out the traditional all-purpose wheat flour with Bob's Red Mill gluten-free flour and some xantham gum.  Along with these cookies being gluten-free, they were made with the support of Divine Chocolate!


Divine Chocolates was one of the sponsors of the NYC bake sale and donated several baking kits to the bloggers to help make some seriously chocolatey treats.  These mallomars wound up super chocolatey because they contained the Divine 70% dark chocolate bars and dark cocoa powder.  The rich chocolate offset the sweet vanilla marshmallow perfectly.


In addition to being able to bake with the Divine Chocolate, the actual farmers (and owners) of Divine were in town this weekend.  I got to meet with and share my mallomars with two of the Ghana farmers.  I'm fairly certain they thought they were a bit too sweet, which means they were perfect for the American palate!  Give them a try!

Disclaimer - I received a package of Divine chocolate for use in this post.  All opinions are my own.

Sunday, September 23, 2012

Why Bother? 2012 - Homemade Sodas Part 2

Today is the first full day of Fall!  I'm so ready for it.  I just bought some fabulous, black ankle boots.  Boyfriend hates them.  I've starting to search the stores for sweaters and picked up a few pairs of tights.  We have even been sleeping with the windows open.  And I've dyed my hair brown.


How are you preparing for Fall?  Bringing those sweaters out of storage?  Heading to Starbucks for a pumpkin spice latte?  Baking apples and cinnamon into everything?


Whatever you are doing on this, this first day of fall, I'm here to bring you the second installment of homemade sodas!  This particular flavor would have been more suited for spring and fresh strawberries.  Strawberry cream soda!


To make yourself a strawberry cream soda, you don't need any fancy equipment.  No soda siphon or CO2 cartridges necessary for this recipe.  All you need is a pint of strawberries, vanilla extract, milk and your liquid sweetener of choice.


After blending all of the ingredients together, I wanted to just sit and drink the strawberry puree.  Look how pretty it looks!  So creamy and fragrant. 


Once mixed with seltzer water, this was a mild and sweet beverage.  I would suggest adding a scoop of vanilla ice cream and curling up in your fuzzy slippers.  Happy Fall Everyone!
Related Posts with Thumbnails