Image Map

Thursday, April 19, 2012

Why Bother? 2012 - Salad Dressing

I planned the posting date for this Why Bother? challenge very carefully.  With the unofficial start of summer a mere six weeks away, I think this is a good time to start eating lots and lots of healthy salads.  I know that there is a group of people out there who just detest eating salads.  Sitting down to a plate of lettuce just doesn't seem right to them.


And who could blame anyone for thinking that way?  Salads can be boring, unsatisfying and just plain forgettable.  There is another train of thought, the one that I have adopted toward the salad.  Salads can be bright, filling and the main course of any meal, with the right ingredients.  And of course, with the right dressing.


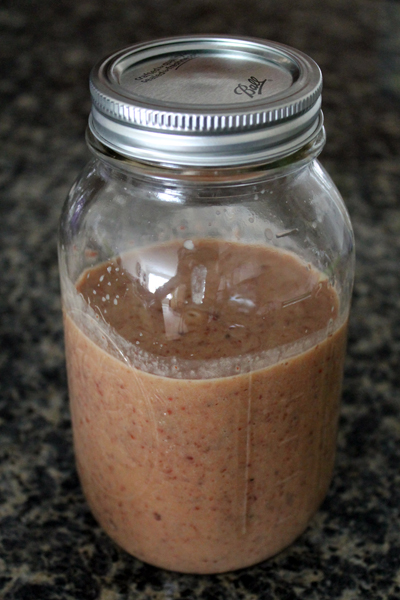
I have had more awful store-bought salad dressings than I care to mention.  The flavors tend to be muted, the salt to everything else in the dressing ratio is way off and the ingredient combinations sometimes wacky.  Sure, there are some pretty delicious dressings out there.  I'm not suggesting you steer clear of the salad dressing aisle completely.  There are just so many reasons to make your own dressings.

1. You know what all of the ingredients are.  As a chemist, I look at the back of a bottle of salad dressing and wonder why they need all of those chemicals.  The main reason?  To make the stuff shelf stable.  Look in your fridge, those bottles have expiration dates.  Granted, they are usually pretty far out from the purchase date.  Please go and throw away all of your old bottles of dressing, you'll have so much more space for the new dressing that you're going to prepare.


2. You can control the salt.  For the same reason that there are so many chemicals in your store-bought salad dressing, there tends to be a lot of salt.  Americans consume far more salt than is necessary for daily life and it affects our health in a negative way.  By making your own dressing, you can add just a pinch of salt (and that's only if it needs it!).


3. Think Fresh.  Those salad dressings sitting on the shelf at your local grocery store can't call any of their ingredients "fresh".  Nothing is better than putting together your own dressing and finishing it off with some freshly chopped herbs (straight from your garden if you're lucky!).  With the flavor that those herbs bring, you'll be leaving the salt shaker on the table.


4. You control the fat.  Along the lines of eating healthy in preparation for bathing suit season, everyone is watching their fat intake.  Store-bought dressings contain primarily soybean oil or canola oil.  There are some true winners out there containing extra virgin olive oil as their main fat source, but you have to be sure to read the labels.  Why settle for flavor-less canola oil when there are so many other delicious options!  From avocado to walnut, there are more options for oils than ever before.


So head out to the grocery store and skip the condiment aisle.  Go to the vinegars and oils section and pick up a few options.  I like to have white wine, rice wine and balsamic vinegar in my pantry at all times.  Specialty vinegars make an occasional appearance and are fun when changing things up, try champagne or pomegranate.

Stock up with a large bottle of extra virgin olive oil, try to catch it when it's on sale!  You'll find other amazing oils, such as walnut, sesame and avocado, often hiding in the natural foods section.  Specialty oils are a little more expensive, but give your homemade dressings amazing flavor.

Tuesday, April 17, 2012

Cookie Dough Fudge

It's time for more candy!  It has been just over a year now that I decided to take on making homemade candy.  It started off innocent enough, with a few marshmallows, and grew into something almost uncontrollable.  Once I realized the vast array of candies that can be made with a simple sugar syrup, I was completely hooked.


Have you joined me on my journey and started making confections in your own kitchen yet?  If you haven't, then you must head to the store immediately and stock up on the following ingredients...

Sugar - I use this by the pound when I get started on a candy recipe heavy weekend.  Luckily, the larger the sack of sugar you buy, the cheaper it is.  Splurge on the ten pound bag.  Get someone with big muscles to carry that grocery bag to the kitchen.

Corn Syrup - Corn syrup is made of glucose and provides the necessary molecular structure for correct crystal formation in your candy.  (I feel like I need to do an entire post on corn syrup, it's so complex!)  Corn syrup is special and I've found that it is almost specific to the Americas.  I've begun testing my recipes with other liquid sugars, like glucose syrup and invert syrup, that are more globally available. 

Candy Thermometer - Available in alcohol and digital, I've had both.  My first candies were made with an alcohol thermometer, it's a perfect, inexpensive option for those just starting out their candy journey.  Just be sure to get down and read the temperature at eye level.  After my alcohol thermometer broke (bubbles may form in the red liquid) I upgraded to a digital model, one with an alarm.  Now I never miss when my sugar reaches hard ball stage!


That's it!  If you want to start making simple candies, all you need is sugar and corn syrup.  If you want to make more specialty candies, invest in some of these items...

Candy oils - These little bottles of oil pack a flavor punch.  Just a few drops of this stuff and your candies will taste like bubblegum, egg nog, cheesecake or root beer.  The options are endless and the flavors are cheap, buy a couple and begin to experiment.

Chocolate or Chocolate Candy melts - You want to coat your candies in chocolate, you need to go out and get some chocolate!  Sometimes block chocolate is elusive at the grocery store.  You can generally find it in the bulk food section of the store and it's usually Merckens.  Whole Foods also sells blocks of chocolate, mine carries the deliciously smooth Belgian Callebaut.  If you want to skip the process of tempering chocolate, you can use candy melts.  They are chocolate flavored and lack the snap that real chocolate has.

Powdered Milk - Mixed with water, this powdered stuff reconstitutes to skim milk. Mix it with a sugar syrup and you can make nougat.

Cocoa Powder - Natural.  Dutch cocoa powder contains a bit of fat and shouldn't be used when making or coating marshmallows.  Cocoa powder will allow you to turn plain nougat into chocolate nougat.  Plain marshmallows into chocolate marshmallows.  You get the idea.

Gelatin - Choose your favorite type, sheets or powdered.  Gelatin is necessary for so many candy treats, marshmallow, sponge candy, certain gummies.  Sometimes you can substitute with egg whites.  Vegetarians out there, I haven't tested any of my recipes with agar powder.  Let me know if you have!


Citric acid, malted milk powder, powdered pectin, invertase, the list could go on and on.  Start out with the basics and soon you'll find yourself trolling the specialty food stores and websites for new candy ingredients to experiment with!  (My primary sources are the King Arthur Flour.com, Lorann Oils.com and Amazon.)

Thursday, April 12, 2012

Why Bother? 2012 - Potato Chips

Why bother indeed.  I was very excited to give homemade potato chips a try.  I sat on my train ride home, dreaming up delicious flavors of potato chips.  Spicy Buffalo and blue cheese.  Parmesan and garlic.  Thai sweet curry.  Alas, this was all not to be.

This is the first challenge of the year that has me a little stumped.  Perhaps it's that I just need a little more time to figure out how to make these bad boys?  Maybe I need to do a bit more research before peeling any more potatoes?  Or maybe, I realized that I prefer cheese puffs to potato chips.  Unless someone out there has a spare cheese puff making machine (as the cheese puffs are puffed with a special vacuum apparatus), I think I'll continue buying my cheese puffs from the store.


I made a batch of oven chips, destined to be Buffalo and blue cheese.  The chips that were too thin, burnt.  The chips that were a little thicker, never crisped up.  I think that I might need to experiment further.  I was so downtrodden by the baked chip fail that I refused to go on and make any attempt at frying some.  It would have been a sad day if I wasn't also preparing these...


Peanut butter and jelly marshmallows!  More candy for candy month!  Opposed to the epic fail of the potato chips, these little fluffy treats were an absolute knockout.  It's so funny too.  The process of making these two-layer marshmallows was not simple.  It required making two separate (and very different) marshmallow batters, cutting, dusting and attempting not to eat them all.  In total it took three hours to get these sweets from sugar to final product.


Not that this should scare you off!  Even if you don't want to make a double-layered marshmallow, each flavor was amazing on its own.  The concord grape layer was sweet and full of flavor (courtesy of the 100% grape concentrate) and they were a ridiculous purple color.  The peanut butter layer tasted just like a fluffernutter sandwich, sans the bread.  Put them together and we have a completely lunch inappropriate PB&J sandwich (although it tastes just like the lunch original).


Related Posts with Thumbnails