Image Map
Showing posts with label pie. Show all posts

Tuesday, June 30, 2015

Butternut Squash Galette

This recipe is not really summer appropriate. I wound up with a bunch of extra butternut squash and was looking for a recipe to use it all up. I came across this recipe in The Smitten Kitchen Cookbook and knew that it would be perfect. While the flavors are more suited for Fall, this dinner tastes wonderful all year long.


This meal won't keep you cooped up in the kitchen for long. You can cook the squash and onions at the same time and use pre-cooked chicken. The summer months are the perfect time to use those roasted chickens from the grocery store. The hands on time for this recipe is pretty small, especially if you use a pre-made pie crust (my savior when it comes to pie crusts are those Pillsbury refrigerated crusts).


This is the perfect dinner for four people. Have a larger group? Just double the recipe! The boyfriend and I had this galette for dinner and then enjoyed the leftovers for lunch the next day. It's just as good hot as it is cold!

One Year Ago: Neapolitan Cake
Two Years Ago: Bacon & Strawberry Pizza
Three Years Ago: Buffalo Sponge Candy Cake
Four Years Ago: Pomegranate Moon Pies
Five Years Ago: Chocolate Cupcakes (High Altitude Recipe included)

Monday, November 24, 2014

Thanksgiving 2014 - Perry's Ice Cream Pie

Thanksgiving week is upon us! I thought that instead of bombarding you with dozens of pumpkin/stuffing/turkey recipes this year, I would give you a single, delicious one. Inspired by my favorite hometown ice cream brand - Perry's Ice Cream!


I'm sure you've all been seeing images of the snowstorm that hit Buffalo, New York last week. Houses buried under five feet of snow, snow drifts up and over cars, highways closed, grocery stores cleared out, people building beer fridges out of the snow, etc, etc, etc. I'm proud to hail from that part of the world and I'm all too familiar with that type of weather. Don't worry about Buffalo. They generally dig out in a day and carry on with their business.

Even with all that snow, Perry's Ice Cream continued churning and making tasty flavors for their local fans. (I'm loving the looks of this chocolate cookies and cream they just created!) Each fall, Perry's comes out with a few limited edition flavors. This year I was lucky enough to receive two containers of their new Maple Cheesecake ice cream!


I promptly ate one of the containers. If you are in the WNY region, be sure to pick up a container of this stuff. The cheesecake flavor is really mild and disappears behind the maple. It's not just maple, there's ribbons of maple crunch running through the ice cream.

The second container was set aside for my "Friendsgiving" this past weekend. I decided that in addition to the traditional pumpkin pie, I would make an ice cream pie. It's an incredibly easy pie to make. Just put together your favorite cookie crust, I made the Momofuku Milk oatmeal cookie crust, and top it with the ice cream! Freeze until solid and serve with some whipped cream.


When given the two options of pumpkin pie and Maple cheesecake ice cream pie, what do you think my friends chose? I'll let the entire pumpkin pie in my fridge answer that question.

Not in a Perry's region? This ice cream pie would also be amazing with butter pecan or toffee-flavored ice creams. Just keep it simple and you'll have a tasty Thanksgiving dessert in no time!


Disclaimer: This post is not sponsored by Perry's Ice Cream. I am a member of their Inside Scoopers program and via this relationship they occasionally send me their new flavors. I receive no financial compensation for these posts and all opinions are my own. That being said, I've been eating Perry's Ice Cream since I was a little girl. It is awesome.

Thursday, November 21, 2013

French Silk Pie

It's apparently Pie Week around the internets. It's this week that everyone in finalizing their thanksgiving menus and dessert is the most important part. At least it's most important in my opinion! It's how you finish off the night and what puts that final nail in the coffin of your food coma.


 Personally I love making pies at thanksgiving because it reminds me of my gram. When I was little, we always went over to grams house for thanksgiving dinner.  We would walk in the door and the entire house would smell amazing. She had a turkey baking in the kitchen and lamb baking in the basement. Yes, she had a second oven in the basement. I'm not sure exactly how safe the whole situation was, but everyone got something they wanted for dinner.


As gram got older, we moved thanksgiving dinner to my aunts house. The aunts and uncles took over the majority of cooking but my gram still made all the desserts. Cherry pie, pumpkin pie and apple pie all made appearances after dinner. Gram was the dessert queen and made a fierce pie crust. Years later I discovered grams secret. Canned pie filling! My dad was so disillusioned. Gram was a definite housewife of the 1950's, she didn't meet a canned good she didn't like. But seriously, her pies were still awesome.


I did not inherit her pie dough making gene. I'm a huge fan of the cookie crust. Or the those rolled up pie crusts from the grocery store. Don't judge, they're yummy. For our early thanksgiving dinner this week, I prepared a chocolate chocolate chocolate French silk pie. It's rich. It's creamy. It's got to get out of my house before I eat the entire thing!


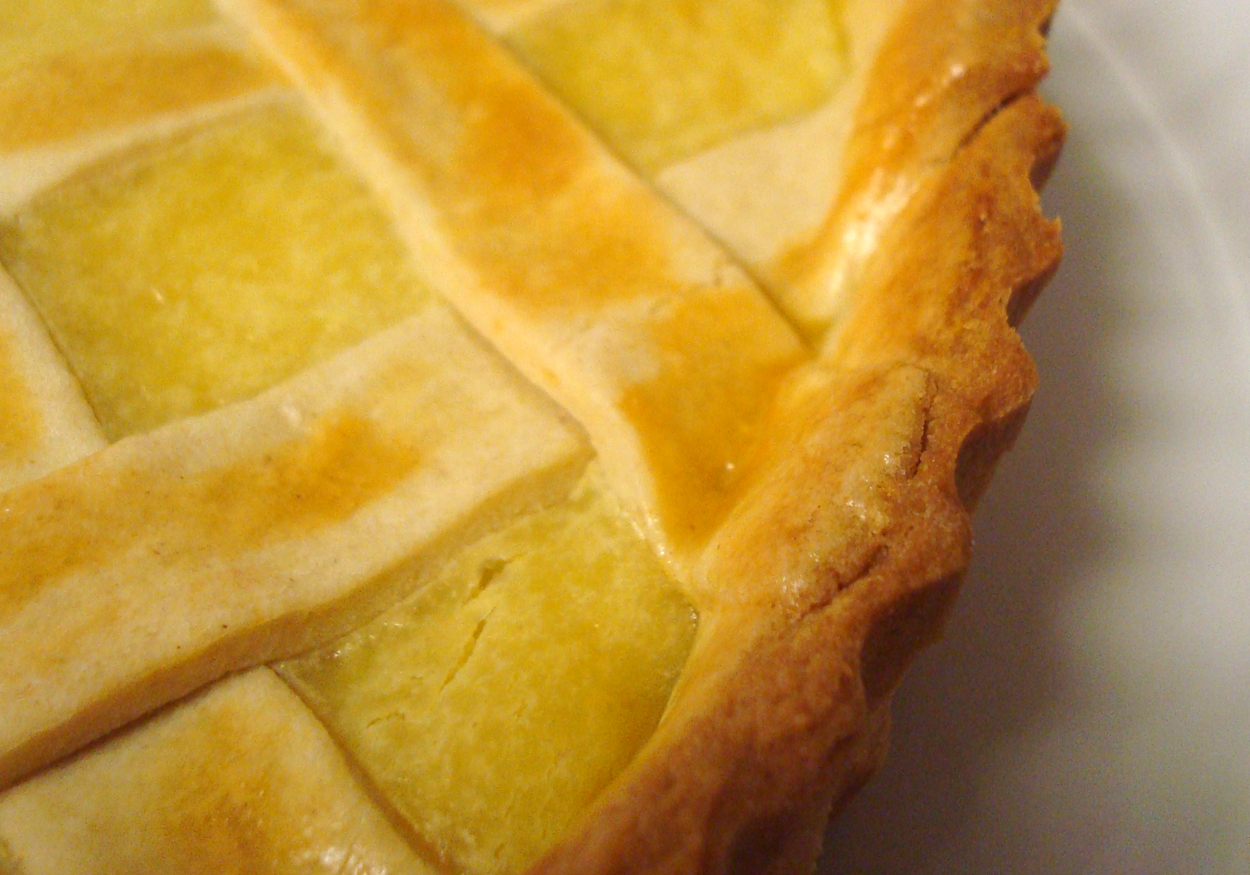
If you're looking for a little something different at your dessert table this year, whip up this pie. It's sure easy.

Two Years Ago: Sausage & Gorgonzola Mac'n'Cheese
Three Years Ago: Lemon Poppy Seed Muffins

French Silk Pie
A Wilde Original

Chocolate Crust
From Momofuku Milk

For the Crumb

2/3 all-purpose flour
1 teaspoon cornstarch
1/2 cup granulated sugar
2/3 cup cocoa powder
1 teaspoon kosher salt
6 tablespoons butter, melted

Preheat oven to 300 ºF and line a baking sheet with parchment or a silpat. Combine solid ingredients with a whisk. Add butter and stir until everything is moistened and you form small crumbs.

Spread mixture on baking sheet. Bake for 10 minutes, stir around. Bake for another 10 minutes.  Remove from the oven and let cool completely before making cookie crust.

For the crust

3/4 crumb recipe (260 g, 1 3/4 cup)
2 teaspoons granulated sugar
2 tablespoons butter, melted

Pulse chocolate crumbs in the food processor until finely ground, sandy. Transfer to a bowl and add remaining ingredients. Knead with your hands until everything can be put together into a ball.

Press dough into a pie pan, using your fingers and palms to flatten the pie crust and push up onto the sides of the pan.  Cover with plastic wrap and place in the fridge to harden.

French Silk Pie
Adapted from The Better Homes & Gardens Cookbook

1 cup whipping cream
1 cup semisweet chocolate chips
1/3 cup butter
1/3 cup granulated sugar
2 beaten egg yolks
3 tablespoons whipping cream

Combine whipping cream, chocolate chips, butter and sugar in a small saucepan. Heat over medium-low heat until chocolate is melted. In a small bowl, beat egg yolks lightly. Slowly pour half of the chocolate mixture into the egg yolks, beating the entire time.  Pour egg mixture back into the saucepan and stir. Cook over medium-low heat, stirring continuously, until the mixture begins to bubble and thickens slightly.

Add remaining 3 tablespoons whipping cream and stir to combine. Place saucepan in a bowl of ice water. Let cool for 20 minutes, stirring every 5 minutes or so. Transfer chocolate mixture to a large bowl and whip on high speed for for 4-5 minutes, or until lightened in color and slightly fluffy.  Pour into prepared chocolate crust and place in the fridge to chill.

Stabilized Whipped Cream
from several sources

1/2 teaspoon powdered gelatin
1 tablespoon water
1 cup cold whipping cream
2 tablespoons granulated sugar

Pour water over gelatin and allow to bloom for 2 minutes.  Microwave, 5 seconds at a time, until gelatin is liquefied.

Beat whipping cream on high speed until frothy. Add granulated sugar and continue beating on high for another minute. Add gelatin and whip on high until you achieve stiff peaks.  Transfer to a piping bag with a large star tip, pipe big loopy designs on your pie.

Monday, October 21, 2013

Gingerbread Truffles for Halloween!

I posed a question a few weeks ago, asking what candy reminds everyone most of Halloween.  The overwhelming response was candy corn, candy corn, candy corn! There seems to be two camps when it comes to the stuff.  Love it or hate it.  Personally, I'm not a fan.  The reason? I don't know what it's supposed to taste like.


I don't like things that don't have a distinct flavor. This is the reason that I don't like Coke or Pepsi, what are they trying to taste like?  Don't answer cola.  That's not a sufficient answer for me.  Oddly enough I really like Dr Pepper, which is basically cherry coke.  I know, I'm strange.


So, candy corn. Right. I went to the grocery store and even bought myself a bag of the classic treat.  I had a few pieces and put the bag away.  The only flavor detectable in a piece of candy corn is sugar.  And a little wax.  I wanted to make some candy Halloween, but I didn't want to make something with no flavor just for the sake of cuteness.  I wanted something with flavor and holiday cheer.


Enter these truffles.  They make look simple and unassuming, but they are packed with flavor.  They taste like Halloween in a bite.  The chocolate center is rich and smooth, with a hint of pumpkin spice and the outside is crunchy and oh so festive.  You won't need more than one of these truffles to satisfy your chocolate and Halloween cravings.


One Year AgoHomemade Almond Milk
Two Years AgoChicken Caesar Pasta Salad
Three Years AgoAcorn Squash Ravioli with Cranberry-Walnut Sauce

Gingerbread Truffles
Adapted from Making Artisan Chocolates

I used my scale and measured the chocolate in grams.  It was much more specific than relying on the markings on the chocolate bars.  You can do it either way, a few fractions of an ounce more of one chocolate or another won't change the flavor too much!

The fridge will be your best friend during this recipe.  If you find that your chocolates are getting too soft at any point, just pop them in the fridge for 5 minutes.

2 ounces (56g) 64% bittersweet chocolate
2 ounces (56g) 84% dark chocolate
3/4 ounce (21g)  milk chocolate
7 1/2 tablespoons (105g)  heavy cream
2 teaspoons (14g) light corn syrup
1 1/2 teaspoons (7g) butter, cubed, at room temperature
Pinch of salt
2 teaspoons cinnamon
1 teaspoon ground ginger
1/2 teaspoon ground nutmeg

1 cup puffed rice cereal
2 teaspoons cinnamon
1 teaspoon ground ginger
1/2 teaspoon ground nutmeg
1 pound white chocolate

Chop all chocolates and place in a large bowl.  Combine heavy cream and corn syrup in a small pot.  Bring to a boil over medium-high heat.  Once the cream comes to a rolling boil, pour over chocolate and let sit for 2 minutes.  Stir with a silicone spatula until smooth.  Using a candy thermometer, let chocolate sit until cooled to 95 ºF.  Add butter and spices and stir until butter is all melted.  Let ganache cool for about 40 minutes and transfer to a piping bag.

Line a baking sheet with parchment paper.  Pipe small blobs of chocolate ganache onto the parchment paper.  If the ganache is too loose and won't form balls, place the piping bag in the fridge for 2 minutes. Roll the blobs of chocolate in your hands until round.

Preheat oven to 350 ºF.  Place puffed rice cereal and remaining spices in a 9x9-inch baking pan.  Toast cereal for about 5 minutes. Transfer to a food processor and pulse 5-6 times, or until cereal is mostly broken up.  You don't want it all to be dust.  Return to the baking pan.

Melt white chocolate in a double boiler (Or bowl set over a simmering pot of water).  Dip truffles one at a time.  Tap off excess chocolate and drop in the cereal crumbles.  Sprinkle top with more cereal and roll around truffle to coat completely.  Let truffles sit in the baking pan until the chocolate is completely set.

Store truffles in the fridge, but bring to room temperature before enjoying!

Linking up at Tasty Tuesdays

Follow me to Tasty Tuesdays at Anyonita Nibbles

Tuesday, January 31, 2012

Tarte au Chocolate au Lait

If I can give you any advice about Paris, it is this.  Do not wait until the day before you need a car, to try and rent one, especially an automatic.  If you wait until the last moment, you will find that there isn't a single automatic car in the entire city of Paris.  But this advice is for the end of our trip through the city of light, the beginning is so much more fun.


Boyfriend and I set out from London to Paris via train, arriving in Gare du Nord.  Then it was time to put my French to its test.  Beginning in the fifth grade, I started learning the French language.  I continued through college and collected a base knowledge and limited fluency of French.  One thing was true, I was much better at reading French than speaking it.  At least this meant we could find our way from the train station to our hotel on the outskirts of Paris.


My grasp of the French language seemed to fool some people, but mostly I would speak in French and be spoken to in English.  Apparently, I need a little more practice.  We did manage to find our hotel, navigate the train system back to the city center and find our way down the Champs Elysee to the Arc de Triomphe.  We made it to the top of the monument just before the Tour Eiffel burst out in a thousand sparkling lights.


Now, how about a little nostalgia?  Shortly after we returned from Europe, I received an e-mail from my mom with the following scan attached.


In French class, way back in middle school, I wrote this itinerary.  My mom wanted to know what I could cross off my list.  Four down, three to go.  With only three days in Paris (and half of one spent looking for a rental car), we couldn't quite get to everything on the list.  I'll practice my French and plan for our next trip to Paris, so that I can finish my list.  Although maybe I'll switch out "Visit EuroDisney" with "Take a trip to Versailles."

Monday, May 9, 2011

Key Lime Pie on a Stick

Way back in the spring of 2004, Boyfriend and I went on our first cruise. At this point in our lives, I was in Grad school in Madison, WI and he was working in Miami, FL. You can imagine that I spent as much time as I could get away with visiting him during the winter months. As we’ve discussed before, winter is not the best time to visit Wisconsin. It’s a little cold and frigid and blustery. For the entire month of February 2004, the temperature didn’t rise above 15° F (we’re talking -10 degrees Celsius here!). The trip to Miami was a welcome break from the ridiculous temperatures.


After arriving in the Miami airport I began to shed my layers of warmth. First, the Northface jacket (basically a down comforter with sleeves) was bundled into a ball and tossed into the back seat. My sneakers and socks were shed in favor of flip flops, allowing my pale feet their first bit of sunshine in months. Finally, I was warm enough to change from my lab uniform of jeans and a t-shirt to a cute sundress. I began to embrace the warm weather and slather on the SPF 50.

Our five-day cruise was sailing out of the port of Fort Lauderdale the next morning, so we enjoyed a seaside dinner on South Beach. If it’s still open, you should head to Rendevous, they have an amazing flatbread pizza. Boyfriend and I took a stroll on the beach and I got lots of sand in my shoes. Let it be known, I love the beach, I hate sand.


The next morning we waved goodbye to our car and sailed away into the bright blue ocean. Our first port of call, Key West. Although we were making other ports while on our cruise, this was the one that I was most excited about. Why? I love Key limes. If you ask my mom, I would ask for Key Lime pie for my birthday. Love that tangy-sweet flavor. My mission while on Key West was to eat some pie. And oh boy, did I.

While walking our miles and miles around Key West, Boyfriend and I stumbled upon Kermit’s Key Lime Shoppe. A haven for all things key lime and therefore my new favorite place in the world. I stocked up on key lime juice (oh the days before the 3 ounce rules), key lime taffy and cookies.

Something that caught my eye was sitting quietly in the freezer with a simple sign - Frozen Key Lime pie on a stick. Think of the combination of tart key lime pie and dark chocolate. The tangy, sweet and bitter flavors played off of each other so well that it was hard to keep myself from eating more than one slice. Years later I found myself wanting to reminisce on Key West. I leave you with an amazing recipe and a suggestion to head to Kermit’s and buy one of the original.


Wednesday, May 4, 2011

Strawberry-Kiwi Pop Tarts

I’ve said it before, I love Gilmore Girls. I record it daily on my DVR and watch it while I workout. I miss my weekly infusion of Lorelai and Rory. I like to pretend that I’m as witty and fast-paced as these two ladies, although I think a lot of the credit goes to Amy Sherman-Palladino. Thank you Gilmore Girls for giving me something to look forward to in the long years of my PhD. As a tribute, I give you Pop tarts and some of my favorite GG quotes.


That's me. I'm fast. I'm the perfect storm of caffeine and genetics.


This tastes pink. Really pink. It's really bad; it's like drinking My Little Pony.


Oh, I can't stop drinking the coffee. I stop drinking the coffee- I stop doing the standing, walking and the words-putting-into-sentence-doing.


Only prostitutes have two glasses of wine at lunch.
Well, then buy me a boa and drive me to Reno because I am open for business.


Hockey puck, rattlesnake, monkey, monkey, underpants!


I know it's not a nightmare 'cause I have shoes on & in my nightmares I never have on shoes.


Do you miss the Gilmores?  How about some of your favorite quotes?

Monday, November 29, 2010

White Chocolate Pastry Cream Crostata

I’m back on the coast! Who knew that not baking or cooking for five days could be so hard? Luckily I have come back with some delicious recipes for you! First we’ll get started with this months Daring Baker’s challenge! I actually tried a couple variations of the challenge, so get set for a week of crostatas!


What is a crostata you ask? Why it is an Italian dessert with a sweet pastry crust, filled with any number of fantastic mixtures. The crust is a pasta frolla, made from flour, sugar, butter and eggs. So simple the dough can be made in five minutes and you can have a crostata an hour later! A little information about our Daring Bakers challenger…

The 2010 November Daring Bakers’ challenge was hosted by Simona of Briciole. She chose to challenge the Daring Bakers’ to make pasta frolla for a crostata. She used her own experience as a source, as well as information from Pellegrino Artusi’s Science in the Kitchen and the Art of Eating well.


The first crostata that I will tantalize your taste buds with is a traditional crust with a dash of lemon zest, filled with a white chocolate pastry cream. I have to say, of the three that I made, it was my favorite. Although they were all pretty amazing. This would make a perfect dessert for the holidays, so get yourself some white chocolate and get ready to be Italian.

Related Posts with Thumbnails