Image Map

Tuesday, March 1, 2016

Salted Toffee with Toasted Almonds

I love making candy. It is surprisingly simple to make and the perfect treat to share. When you bring a cake or a box of cupcakes to the office, people whine about calories and suggest that you are trying to fatten them up. Candy is generally welcomed with open arms (and open mouths) and quickly disappears from the office kitchen.

In my quest to make more candy in 2016, I decided to finally take on a traditional English toffee recipe. After finishing, I have no idea why I didn't make it sooner. The recipe was fast and easy. While you have to babysit the sugar syrup through the whole process, you won't be slaving over the stove for long.


I decided to top the toffee with just flaked sea salt and toasted almonds. Going overly fancy with a toffee recipe seems like a bad idea. The candy is so classic, why trash it up with gummy bears, hot sauce and cotton candy? Just be sure to use toasted almonds to bring out all of their nutty flavor!


This recipe doesn't make a massive amount of candy. Breaking it up into about two dozen pieces gives you a good amount of candy to share with your friends, family or coworkers, without being overwhelmed with a ton of sugar!

What candy should I attempt next? I'm stocking up on granulated sugar with big plans to make it a sweet spring!

One Year Ago: Raspberry & Cheesecake Mousse Entremet
Two Years Ago: Portuguese Sweet Bread
Three Years Ago: Chicken Florentine Pasta
Four Years Ago: Peach Tea Macarons
Five Years Ago: Chocolate Buttercream Truffles

Sunday, February 21, 2016

J@H - Moon Pies

Continuing with my quest to finish my 2015 challenge, I bring you Homemade Moon Pies!


Now, I'm not really sure what part of the country you find moon pies. I feel like they are not a nationwide snack. I managed to locate one at my local Foodtown and was able to taste test the original.


What Did I think? Blech, not terribly impressive. To be perfectly honest, it wasn't at all what I was expecting. The only version of the Moon Pie that I could locate was a vanilla, double-decker version. Thankfully I only bought one, rather than an entire box, because they would have all gone to waste.


Making a homemade version of this treat was going to be easy. Bake some graham cracker rounds, fill them with marshmallow and cover them in chocolate. That was right up my alley, I'm old hat at making marshmallows and I love coating things in chocolate. I went to my favorite vanilla marshmallow recipe and made a small change to my graham cracker recipe. The whole thing came together pretty quickly.


These homemade Moon Pies were so much tastier than the store-bought version. The recipe made about 24 sandwich cookies. I ate about half of them without the chocolate coating and shared the completed cookies with my friends. They were amazing both ways! You should definitely think about making your own moon pies before picking them up at the store.


One Year Ago: Girl Scout Samoa Cookies
Two Years Ago: Cookie Dough Stuffed Chocolate Cupcakes
Three Years Ago: Cherry Kuchen Bars
Four Years Ago: Cherry-Coconut Bagels
Five Years Ago: Cherry Turkish Taffy


Thursday, February 4, 2016

J@H - Fauxritos

It's time to finish my 2015 challenge! First up, Fritos! Or as I've called them "Fauxritos".  I don't know why I didn't make these earlier, they were really easy.

The only issue you might have with these is if you don't like deep frying. The boyfriend got me an electric deep fryer for christmas last year and it really takes the worry out of frying. Set the temperature and it will take care of everything else!


It took me a few batches before I was able to decide on the idea thickness for the dough. To make things easy for myself I used these rolling pin guides.  An offset spatula made it really easy to transfer the dough from the counter to the fryer.


The recipe doesn't make a huge batch of chips, just enough for one evening of TV watching. You can always increase the batch size if you have a big Super bowl party this weekend!
 
One Year Ago: Parmesan Fries
Two Years Ago: Magnolia's Banana Pudding
Three Years Ago: Homemade Granola
Four Years Ago: Thai Sweet Potato Stew
Five Years Ago: Cranberry-Walnut Celebration Bread

Fauxritos
From Classic Snacks - Made from Scratch

Vegetable oil for frying

1/2 cup masa harina
1/3 cup yellow cornmeal
1 teaspoon kosher salt
1/2 teaspoon sugar
1/4 cup plus 2 tablespoons water
1 tablespoon vegetable oil

Heat about 2-inches of vegetable oil in a deep pot or your electric deep fryer to 350 °F. Line a baking tray with paper towels and top with an upside down wire cooling rack.

Whisk together masa harina, yellow cornmeal, kosher salt and sugar. Whisk water and vegetable oil together, add to dry ingredients and stir until the dough comes together into a ball. Let the dough sit for 5 minutes.

Roll out dough to a little less than 1/8-inch thickness. Using a pizza cutter, cut dough into 1/2-inch x 1 1/2-inch rectangles. Fry rectangles until they are golden brown and most of the bubbling subsides. Remove chips from the oil with a wire spider strainer. Place on the prepared baking sheet and let the oil drain.

Eat within two days, otherwise they get soggy.

Tuesday, February 2, 2016

Greta Bars

This year for Christmas I asked for only one cookbook. If you've seen my collection, then you know that this is a strange occurrence. I love getting new cookbooks and spending my weekends reading through them. Whether it's to get new ideas for dinner, gain blogging inspiration or to just look at the pretty pictures, I have a massive collection of cookbooks.

The cookbook I requested this year was Milkbar Life, by Christina Tosi. I already own her original cookbook and have baked my way through a good portion of it. I have also taken three of her baking classes in Brooklyn and fell in love with her food attitude. Milkbar Life promised simpler recipes with delicious results. 

Christina didn't lie.


I decided to break in the cookbook by trying out The Greta. A classic sugar cookie bar from her mothers kitchen, these cookies are heaven. Just barely under-baked and covered in a serious amount of sprinkles, this pan of cookies quickly disappeared from my kitchen.


While I probably won't try every single recipe in the book (Hanky-pankies on page 24? No, thanks), many of the recipes are classic, grandma approved recipes. I think the boyfriend will be a big fan of this book, the food isn't fancy or pretentious.

Now excuse me while I go finish off the last of these cookies...

One Year Ago: Sauteed Chicken and Pears
Two Years Ago: Chocolate Heart Sandwich Cookies
Three Years Ago: Chocolate Chip Cookie Dough Yogurt Popsicles
Four Years Ago: Poffertjes: Cheese Pancakes
Five Years Ago: Orange Chiffon Cupcakes

Tuesday, January 26, 2016

Candy Challenge 2016 - Gianduja Molds


This past weekend I enjoyed the massive East Coast snowstorm from the safety of my kitchen. While I am no stranger to snow, having grown up in Buffalo, NY, absolutely nothing was open and there was no where to go. The majority of shops and restaurants closed in advance of the storm and didn't open until late on Sunday. I decided it was the perfect time to make some chocolates and prepare for Valentine's Day!


I am not a huge fan of making molded candies. They are just too much work in my opinion. I would rather make a truffle or marshmallow, something a little more rustic looking. I always make a giant mess when I make molded candies, this batch was no different. My kitchen counter was covered in chocolate.

While the process was a pain in the butt, the final product was totally worth it. These candies are really good! If you are a chocolate and peanut butter fan, then you should give these candies a try.

Time to mark up one candy on my 2016 challenge list!

One Year Ago: Gingered Chicken Stir Fry
Two Years Ago: Bacony Chicken
Three Years Ago: Fudgy Waffles
Four Years Ago: Soft Pretzels
Five Years Ago: Chocolate & Peanut butter Mousse Entremet

Thursday, December 17, 2015

Christmas Cake & Ice Cream

With just a week left until Christmas, it's time to choose your dessert recipes and head to the grocery store. I'm going to recommend making something that looks fancy but isn't that difficult to make at all! A roulade!


A roulade is simply a thin sponge cake, rolled up with a buttercream filling. You can add any flavoring to the buttercream to change it up for the seasons. Instead of making a peppermint or chocolate roulade, I decided to pair my cake with an incredibly flavorful ice cream!


I'm happy to be working with one of my favorite hometown brands - Perry's Ice Cream - and bring you their amazing new Winter flavor! A few weeks ago, I received a package containing their traditional Fall flavor, Pumpkin Pie, and this new one, Gingerbread cookie. I was a little leery at first, I'm not a huge gingerbread fan, but one bite had me converted. Even the boyfriend took me up on the offer to try some and he wound up making a good dent in the container.


This ice cream is surprisingly complex. The gingerbread ice cream base is dotted with cookies and filled with ribbons of vanilla icing. I only wish that they sent me just one container, because I will inevitably eat both containers myself.

To make the roulade cake, I enlisted the boyfriend to help me. He generally avoids baking with me, it's not his thing, but this was my lucky day! After prepping all of the ingredients, the cake came together very fast. After cooling, filling and rolling, this cake really topped off our evening. It would make for an impressive and delicious addition to your holiday table!

Disclaimer: I received a box full of Perry's Ice Creams Fall/Winter flavors to try out. I have not received any other compensation for this post and all opinions are my own. I am so happy to partner with small, local companies and share them with the world. I grew up with Perry's and it continues to remind me of home.

One Year AgoWilde Cookies - A list of all the cookies I've made here at WITK!
Two Years AgoCranberry-Orange Soda
Three Years AgoEggnog Mallomars
Four Years AgoThai Chicken Curry
Five Years AgoChorizo & Vegetable Soup

Wednesday, December 16, 2015

Great Food Blogger Cookie Swap 2015


It's been a busy year around the Wilde household. I've barely had enough time to cook real food, with next to no time to spend in the kitchen making something fun. I made sure to make time this season to participate in the annual Great Food Blogger Cookie Swap.

 The Great Food Blogger Cookie Swap 2015

This year I decided to make a classic Christmas treat in mallomar form! Each year for Christmas, my mom buys my dad a box of cherry cordials. I always sneak one (or two) from the box and they always remind me of the holidays. 


Cherry-vanilla marshmallow sits on top of a crisp chocolate cookie. Covered in milk chocolate and topped with a candied cherry, these cookies taste just like the cordial candy, but without the liquid candy center. This recipe may sound daunting, but it's actually very straightforward. If you've never made marshmallow before, don't worry, it's much easier than it looks. The most difficult thing is piping the marshmallow onto the cookies. It takes a few practice pipes before you get the right technique.


If you are looking for one more cookie to add to your tray or bring to a cookie swap, give these a try! They look really impressive and taste even better!

One Year Ago: Candy Cane Mallomars
Two Years Ago: Gingerbread Mallomen
Three Years Ago: Pinata Cookies
Four Years Ago: Peppermint Mallomars
Five Years Ago: Browned Butter Spritz Cookies

Sunday, November 1, 2015

J@H - Brownie Donuts with Peanut Butter Glaze

I have been looking forward to making my own donuts all year. Yes, I realize that I could have made donuts at any time, but it's been a crazy year and I haven't made breakfast once this year. I really need to make myself some French Toast this weekend.

A few years ago, I made a classic fried donut. This time I decided to go with a healthier cooking option and baked them. Rather than going completely healthy, I packed these with chocolate and covered them in peanut butter.


These donuts are dense and chocolatey, I can't responsibly tell you to eat these for breakfast.  I would suggest that you should make these and have them for dessert under a big scoop of vanilla ice cream.


I think that I need to make another batch of donuts. Something that is a little lighter and more breakfast appropriate. Maybe something packed with oranges or bananas?


Who am I kidding? These are delicious and probably just as good for you as having Pop Tarts for breakfast! The peanut butter frosting is the perfect topping to these dense brownie donuts. Get yourself a whole bunch of chocolate and butter and make these donuts! Then bring them to work and make all your coworkers happy (and fat).

One Year Ago: Loaded Potato Soup
Two Years Ago: Halloween Mallomars
Three Years Ago: Butternut Squash Cake
Four Years Ago: Pumpkin Raisin Muffins
Five Years Ago: Pear Cake with Pine Nuts

Monday, October 12, 2015

OXO Good Cookie - No-Bake Cookies

Today I am partnering with Oxo and this blog post is dedicated to Cookies for Kids Cancer. In my professional life I work in oncology research and see the impact that cancer has on not only the patient, but all the people in their circle. The organization Cookies for Kids Cancer raises funds for research to develop new, improved treatments for pediatric cancer. As a researcher, I could spend this entire post talking about the genetic drivers of pediatric cancer, but instead we are going to discuss how cookies can help.


The OXO Good Cookies program is partnering up with bloggers this month to raise awareness about pediatric cancers. For each blog post, OXO donates $100 to Cookies for Kids Cancer! In addition to this, OXO has brought out a special line of bakeware to help support the cause. Look for OXO products with the Cookies for Kids Cancer logo. For each item purchased, they will donate $0.25 to the cause. Specifically, you can get this adorable cookie spatula! For this recipe I used their non-stick half sheet pan, medium cookie scoop and cookie spatula.


I was happy to join the cause this month and create a blog post about cookies. There was only one problem - my oven. Since we bought our house last year, the oven has been acting up. Specifically, the controller board for the oven has been randomly shutting off. This first happened just before Thanksgiving last year. We were able to fiddle with it and it would turn back on, until last month it finally died. What to do? Make no-bake cookies!


These cookies take about five minutes to make, especially with use of the cookie dough scoop. There are just three steps - 1. Bring sugar syrup to a boil  2. Stir in oats and flavors 3. Scoop out cookies.


Seriously, it's that easy. Once that's done you just need to walk away for 30 minutes! These are the easiest cookies to make, especially when you have no oven!


Be sure to get involved in aiding research for pediatric cancer. You can either buy OXO products, donate directly to the fund or even host a cookie sway of your own! Every cent helps with research in the field and those cents add up to improved survival for the patients.

One Year Ago: Rigatoni with Pepperoni, mozzarella & arugula
Two Years Ago: Dulce de Leche cookies
Three Years Ago: Apple Pie Ice Cream Topping
Four Years Ago: Caramel Brownies
Five Years Ago: Thin Mint Ice Cream

Disclaimer - OXO provided me with a set of bakeware to use in this blog post.

  • Cookies for Kids' Cancer is a recognized 501c(3) public charity duly incorporated under the laws of the state of New Jersey. Your donations are tax deductible to the fullest extent allowable by law. 100% of proceeds raised by Cookies for Kids' Cancer fund pediatric cancer research.
  • OXO will be donating $100 to Cookies for Kids’ Cancer for each blog post dedicated to this campaign in October (up to our $100,000 commitment*.)
  • *In 2015, OXO will donate up to $100,000 to Cookies for Kids' Cancer through product proceeds, bake sale matches and other fundraising efforts

Wednesday, September 23, 2015

Pumpkin Mallomars

With the return of the fall weather, something else is returning to our lives - Mallomars! Mallomars are too delicate and meltable to ship to grocery stores in the summer, so we always see the return of these sweet treats right around Labor day. Seeing them on the grocery store shelves made me want to whip up another batch myself.


If you've been a long time reader of WITK, you may remember that I made pumpkin mallomars several years ago. I think it was three years ago... Feel free to go back into the archives and check those out too, they're totally different from these pumpkin mallomars. The old recipe has a pumpkin marshmallo, vanilla cookie and they're coated in white chocolate.


Rather than getting fancy with the marshmallow, I stayed super traditional with a vanilla marshmallow. Where the pumpkin comes in is the cookie! A pumpkin cut-out cookie? How did I not think of this years ago? Adding pumpkin to a cookie recipe is so much easier than trying to balance the flavors and texture of a candy. These cookies came out of the oven smelling like Fall and so delectable, even without the marshmallow topping.


The marshmallow on top really brings these cookies to a whole new level. Actually, they taste just like pumpkin pie. Seriously! The delicate flavors of the pumpkin cookie and vanilla marshmallow taste just like you popped some vanilla whipped cream on top of your pumpkin pie.


Of course these aren't exactly like a traditional mallomar. Most importantly, they aren't covered in chocolate. I coated my first few mallomar recipes in chocolate. I came to realize that the chocolate flavor was covering up the mild flavors I was infusing into the marshmallow or cookie. Therefore, we will call these "Naked Mallomars" from here on out.

Also, don't let the homemade marshmallow scare you off. Personally I've made marshmallows at least two dozen times. It gets easier and easier each time you put a batch together. This vanilla recipe is simple, quick and takes no more than 15-20 minutes to go from ingredients to piping bag. Have marshmallow questions? Leave them in the comment section and I'll try to be of assistance!

One Year Ago: Watermelon Mallomars
Two Years Ago: Pumpkin-frosted, caramel-filled, vanilla cupcakes
Three Years Ago:Ramen Vegetable Soup
Four Years Ago: Pomegranate Ice Cream
Five Years Ago: Apple cake with Brown sugar icing

Wednesday, August 12, 2015

J@H - Snickers Bars

Sorry for my lack of posting lately. My kitchen is currently sitting in my living room.


Over the past year, the boyfriend and I have been updating, renovating and decorating our first house. We have been putting off renovating the kitchen because it is the biggest job in the house. We pulled up the old flooring (three layers of tile, Peel & stick tile and linoleum) on Saturday. Re-tiling of the kitchen has taken up the past few days with grout planned for the weekend. We still have to choose a paint color, paint and then install a backsplash. We'll probably be out of the kitchen for another week or so.

Luckily, I had time to put the finishing touches on these bad boys before pulling the appliances out of the kitchen. I've been looking forward to recreating this classic candy in my kitchen. It took a few tries to get the layers right, but the final product is so fantastic!


Rather than coating the entire candy in chocolate, I went with the simpler option and built the candy bar in layers in a 8x8-inch pan. First went in a layer of chocolate. Next I made and pressed in the peanut butter nougat. After setting overnight, I made three different batches of caramel before finally making one that I was happy with. I stirred in the peanuts and poured it over the top. Once the caramel set up, I added the final layer of chocolate.

Do these bars taste exactly like a Snickers Bar? No. But they do taste delicious. They are also a labor of love. There are several other Snickers Bars recipes out there on the internet that are easier to put together. If you want to make everything from scratch and avoid ingredients like marshmallow fluff and store-bought caramels, give this a try!

Though, after all the trouble I had with the caramel layer, I might go with the easy way out next time!

One Year Ago: Hazelnut Cream Cheese Brownies
Two Years Ago: Peach Melba Linzer Bars
Three Years Ago: Gorgonzola & Leek Risotto
Four Years Ago: Orange Cinnamon Bread
Five Years Ago: Spanish Chicken with Mustard-Green Onion Sauce

Tuesday, July 21, 2015

Happy 5th Birthday WITK!

I can't believe that it's been five years since I started writing here at WITK! I remember reading food blogs during my down time in the lab and thinking that I'd like to share my cooking online too! A lot has changed since those early days in the kitchen...


In 2010, I was living in Colorado and getting ready to move to Connecticut. It was probably the worst time to start a food blog, since my kitchen was about to be packed up and shipped off to the East Coast!


I spent a year cooking from my tiny studio apartment in New Haven, Connecticut, before landing my first real job and moving to New Jersey. Not just moving to New Jersey, but moving in with my boyfriend of eight years.


I spent almost two years at my first job before the company was closed and I found myself unemployed! During my six months of unemployment I started a lifestyle blog, Wilde in the City, interviewed at a half dozen pharma companies and traveled the US with the boyfriend.


These days I'm happily at a new pharmaceutical company, in a completely different position, traveling the world and occasionally getting into the kitchen. With my work and travel schedule, I've been lax with my posting here at WITK, but I couldn't let this date pass me by!


Since it's July, I thought that I would celebrate the fruit of the season - the Strawberry! The cake is flavored with ripe strawberries and layered with strawberry compote and fresh whipped cream. To top it all off, the cake is covered with an amazing cream cheese frosting.

Thank you for coming along on this exciting journey at WITK! I wish you could all come over and have a slice of cake. I guess I'll just have to eat it all myself!

One Year Ago: Neapolitan Cake 
Two Years Ago: Milky Way Cake
Three Years Ago: Sponge Candy Cake
Four Years Ago: Pizza Foccacia
Five Years Ago: Chocolate Cupcakes

Thursday, July 16, 2015

J@H - Cheesey Popcorn

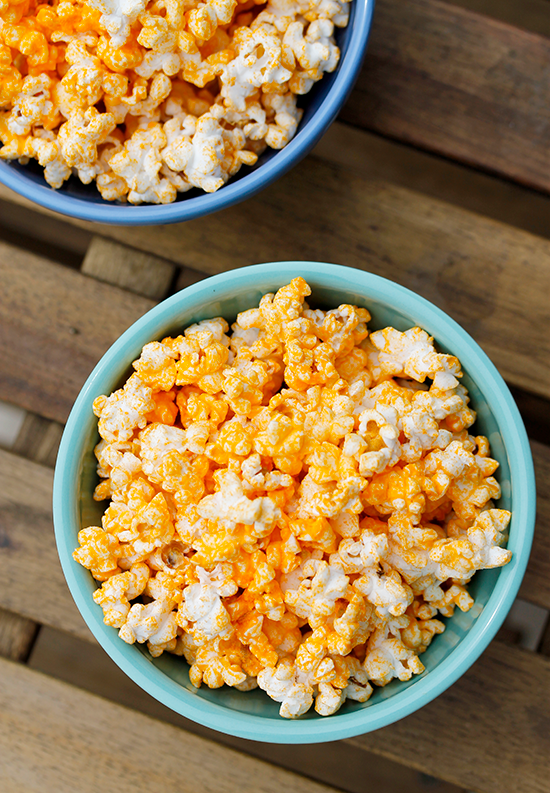
Making cheesey popcorn is almost as easy as buying it! Well, once you locate the necessary ingredients, but that's what Amazon is for! Go there now and place your order for cheese powder, buttermilk powder and popcorn kernels. You'll be making your own cheesey popcorn in no time!


Also, I have to mention that I did all of this without a microwave. We are still renovating our new house and haven't gotten to the kitchen yet. There are grand plans to install an over-oven microwave, but that hasn't happened yet. I tried a few different methods until I came upon this popcorn popping procedure. It pops all the kernels and doesn't burn the finished popcorn.


You may be asking if this cheese popcorn is "better" for you than the store-bought variety. The popcorn itself is so easy, it's worth ditching the microwave stuff. Sadly, if you're for all-natural everything, the cheese powder may be outside of your comfort zone. The yellow cheese powder contains yellow #5, a food safe synthetic dye. Want something a little less yellow? Try this white cheddar powder.

Natural or not, I ate the entire bag of popcorn in one evening. So good.

One Year Ago: Peanut Butter Bar Ice Cream Sandwiches
Two Years Ago: Nutella Thumbprints
Three Years Ago: Strawberry-Lemon Preserves & Ginger-Pear Preserves
Four Years Ago: Peanut Butter Chocolate Chip Ice Cream
Five Years Ago: Crunchy French Toast

Tuesday, July 7, 2015

Tahini Cookies

Some items should really be sold in much smaller containers. For example, chicken bullion cubes, fancy vinegar and cornmeal. Generally, you need just a tablespoon for the recipe and are left with a near-full container of the ingredient. Tahini is another ingredient that always languishes in my pantry until it reaches its expiration date.


Thanks to Cooking Light Magazine, my tahini now has more purpose! I recently noticed a new section in the magazine called the "Use it Up Challenge." The May 2015 (I'm a little behind in reading magazines!) ingredient was tahini! While all of the recipes sounded fantastic, I'm making the orange-tahini vinaigrette next, these tahini cookies fit the bill for my Sunday plans.


They come together a lot like a peanut butter cookie recipe, but the flavor is completely different. If you like tahini (which if you have it in your house, I'm assuming you do), you'll love these cookies. The whole recipe comes together in about an hour - from ingredients to baked cookies.


The recipe also makes a completely realistic number of cookies - 24. Even though this recipe comes from Cooking Light, I wouldn't consider it to be healthy or low fat. The recipe includes refined sugar and butter. Enjoy them for the flavor and try not to eat all of them in one sitting!


What ingredients sits in your pantry month after month? I'd love to start my own version of CL - Us it Up Challenge and help everyone use up those weird ingredients!

One Year Ago: Peanut Butter Chocolate Chip Ice Cream Bars
Two Years Ago: Vanilla Ice Cream with Roasted Cherry Swirl
Three Years Ago: Simple Arugula Salad
Four Years Ago: Oatmeal Pancakes
Four Years Ago: Chocolate Buttercream & Peanut Butter Cream Cheese Frosting

Thursday, July 2, 2015

Thai Chicken with Peanuts

Don't want to spend a ton of time in the kitchen, prepping dinner and sweating over the oven? Make a stir fry! At least once a week during the summer you can find me tossing ingredients into a big pan and pouring on different sauces. Stir fry isn't really a science. I usually don't follow a recipe and cook up whatever we have in the fridge.


Yes, the stir fry is the ultimate pre-vacation meal. You can clean out the fridge and use up any meats and vegetables. For this stir fry, had a bunch of sweet peppers and carrots, as well as a pack of chicken sitting in the fridge. With a business trip coming up on Thursday, I decided to use up the stuff in the house, rather than buy groceries this week. Also, since I tend to make a lot of stir frys, I had all the ingredients for my sauce already. My pantry is a well-stocked stir fry zone!


What is your go to "Use it up" recipe? With so many business and personal trips this year, I find that I've been tossing way more food than I would like. Resorting to eating out each night is not the best plan either, for the wallet or the waistline!

Two Years Ago: Milky Way Cake
Three Years Ago: Peanut Chicken with Asian Slaw
Four Years Ago: Banana Coconut Muffins
Five Years Ago: Indian Chicken Curry

Tuesday, June 30, 2015

Butternut Squash Galette

This recipe is not really summer appropriate. I wound up with a bunch of extra butternut squash and was looking for a recipe to use it all up. I came across this recipe in The Smitten Kitchen Cookbook and knew that it would be perfect. While the flavors are more suited for Fall, this dinner tastes wonderful all year long.


This meal won't keep you cooped up in the kitchen for long. You can cook the squash and onions at the same time and use pre-cooked chicken. The summer months are the perfect time to use those roasted chickens from the grocery store. The hands on time for this recipe is pretty small, especially if you use a pre-made pie crust (my savior when it comes to pie crusts are those Pillsbury refrigerated crusts).


This is the perfect dinner for four people. Have a larger group? Just double the recipe! The boyfriend and I had this galette for dinner and then enjoyed the leftovers for lunch the next day. It's just as good hot as it is cold!

One Year Ago: Neapolitan Cake
Two Years Ago: Bacon & Strawberry Pizza
Three Years Ago: Buffalo Sponge Candy Cake
Four Years Ago: Pomegranate Moon Pies
Five Years Ago: Chocolate Cupcakes (High Altitude Recipe included)

Related Posts with Thumbnails